Beginner Jewellery Macro ?

Messages
15
Name
craig hannan
Edit My Images
Yes
Hi, i am very new to photography and looking for some advice, i am self employed and started taking my own product pictures to save some money and became genuinely interested in the world of macro, the problem i am having is that i recently started selling some very small pieces of body piercings, some of which have gemstones as small as 2mm across and the whole piece would measure 6mm in diameter, being very green to photography i am struggling to get the right shot, ideally i would like to show the whole piece of jewellery with clear detail but i always seem to get some blur, i have attached a picture from a guy who used to do my photography, this is the type of result i was hoping to achieve even though there is still some blur which ideally i would like to get rid of if possible, i am using a Canon eos 90d ( kit which comes with the basic kit lens) and a Canon EF-S Macro 60mm F/2.8. To be honest im not sure if im even using the right lens in the macrolesn, should i use the kit one insteadzzzzzzzzzhorseshoe.jpg
 
Obviously, the lens is important for sharpness and detail, but the most important thing for jewellery photography is lighting (same with most product photography).

This is a skill that takes a lot of learning and isn't easy for the beginner and jewellery is probably one of the most technically challenging.

FWIW, I think you should talk to a photographer who specialises in this area.
 
trouble is the cost, £25 per picture, i paid £3500 for pictures a couple of months ago.
 
Well, you paid for the knowledge and experience, I guess. That would have been the bulk of the £25.
 
its not something i can afford though, im the same as everyone else trying to make ends meet, ive broke myself paying for the camera and lens
 
TBH if the image you have shown is one you paid £25 for I be asking for my money back, very little of it looks acceptably sharp.

It looks like there is a combination of things going on, camera shake will make the shot soft so you need a tripod. With macro you also get blur due to the very shallow depth-of-field that is inevitable with macro, the depth-of-field gets shallower the closer the lens is to the subject - google will give you more information. Another thing that controls depth of field is the aperture so a small aperture (f16, f22) will give you a greater depth of field. but means you either need more light or a longer shutter speed (tripod again) or both.

Finally if you have the software for it you can do "focus stacking" where you take multiple shots focused on different parts of the subject and then combine them to get the whole product on focus.
 
Personally I feel you need a dedicated Macro lens and at the very least a fill flash (off camera) a nice scratch free piece of plasitc or similar to give reflection etc

I shot this using a Sony 90mm macro lens and a Godox V1 flash with dome diffuser- through an XPro Trigger off camera- camera and lens on a tripod - the flash high and slightly off center


5ZKfYoQ.jpg


Les :)
 
TBH if the image you have shown is one you paid £25 for I be asking for my money back, very little of it looks acceptably sharp.

It looks like there is a combination of things going on, camera shake will make the shot soft so you need a tripod. With macro you also get blur due to the very shallow depth-of-field that is inevitable with macro, the depth-of-field gets shallower the closer the lens is to the subject - google will give you more information. Another thing that controls depth of field is the aperture so a small aperture (f16, f22) will give you a greater depth of field. but means you either need more light or a longer shutter speed (tripod again) or both.

Finally if you have the software for it you can do "focus stacking" where you take multiple shots focused on different parts of the subject and then combine them to get the whole product on focus.

Focus stacking isn't really practical for bulk shots like these and not neccesary at products this size. A good macro 1:1 lens, the right lighting and diffusion along with some jewellery lights and reflectors will sort it but it takes time to do the initial setup and it's very easy to end up with gems stones that look matte. I fully agree that the image in the OP is not great and nowhere near sharp enough. Camera shake shouldn't be an issue as these should all be done on a tripod with a cable release and the macro lens manually focused.
 
Personally I feel you need a dedicated Macro lens and at the very least a fill flash (off camera) a nice scratch free piece of plasitc or similar to give reflection etc

I shot this using a Sony 90mm macro lens and a Godox V1 flash with dome diffuser- through an XPro Trigger off camera- camera and lens on a tripod - the flash high and slightly off center


5ZKfYoQ.jpg


Les :)

The gem stones are all matte, tho, Les. They need to sparkle or it looks like sea glass.
 
Just saw this thread and I'm also going to get into some macro shots soon, using Micro 4/3. Need to pick up the right lens. Already have a couple of light boxes used for product photography but need to improve diffusion on those.
I'm kinda torn between the available options. 60mm and 45mm options are expensive. 30mm option might offer slightly better DOF (is that true?) but of course requires closer subject distance.
Has anyone tried using in camera focus stacking? I have a GX9 which does it but I've not had much of a play yet.

I'd post your question in either the Panasonic G owners thread
or the Olympus owners thread, I know there are some great macro photographers there who have opinions on the lens options.

For what it's worth I bought some cheap FOTGA extension rings to try my hand before I bought a macro lens.
I used them on various lenses but the best ring shots were taken with a 14-42mm kit lens.
What I discovered was I haven't the patience or attention to detail required to get great results so it was money well spent.
If you go down that route make sure you get ones with electrical contacts or you won't have aperture control - you're better off manual focusing but you still need power.

My results inc. some rings I made on a workshop day
 
Just saw this thread and I'm also going to get into some macro shots soon, using Micro 4/3. Need to pick up the right lens. Already have a couple of light boxes used for product photography but need to improve diffusion on those.
I'm kinda torn between the available options. 60mm and 45mm options are expensive. 30mm option might offer slightly better DOF (is that true?) but of course requires closer subject distance.
Has anyone tried using in camera focus stacking? I have a GX9 which does it but I've not had much of a play yet.

I have a film era Sigma 50mm f2.8 1:1 macro, on MFT that'll equate to 100mm which could be a good focal length. If you can find one and add a cheap adapter you could have a macro set up that's pretty cheap.
 
  • Like
Reactions: Pin
A little pop up studio with built in lights or natural daylight with the ring either on a black piece of shiny acrylic or a matte surface. Camera on tripod. This is an image I took using F6.3, 300mm 1/320s, handheld, which negates all the lens, aperture advice given so far! Just goes to prove I think that there are lots of ways to get the shot.
N5C_2667-1.jpg
 
There's a great deal to think about here . . .
1. True professional photography is well worth the expense, simply because it makes a massive difference to sales - but although £25 per shot is on the low side for a real professional, your example "professional" shot seems to me to be overpriced for what it is. There's an exception though, if you're selling on Amazon, because under their current T&C's, everything uploaded to them becomes their property and they'll use your shots for your competitors' photos as well as for yours . . ..

2. You CAN learn to do it yourself, and I have a book Product Photography Magic that covers this, available from the evil Amazon. It takes many years of experience and a lot of equipment to become a "real" product photographer but if you only need to learn how to photograph a single subject type, as in your case, it isn't nearly as difficult and you can easily become better than most of the affordable pro photographers.

3. It's almost all about the lighting - forget about pop up studios, light boxes, light tents, light cubes or any of the other junk that makes wild promises - all that these gimmicks actually do is to produce bland lighting that won't sell your products. There are some lighting tutorials in the "Tutorials" section on here. One simple tip to get you thinking along the right lines though . . . small items such as these need to really pop, which can be difficult to achieve with small items, so raid your kitchen drawer and make some tiny reflective balls from rolled-up kitchen foil (shiny side up) that will create bright reflections in your subject when lit well and placed with care.

4. Your macro lens should give much better results than our kit lens.

5. Depth of field is always a challenge with tiny subjects, set a small aperture to maximise this, but with your camera don't go smaller than f/11, because f/16 or smaller will create a different problem caused diffraction limitation, which creates an overall lack of sharpness.

6. Focus stacking is probably the best solution, and if you have specialist software (or if you subscribe to the full version of Photoshop) it's easy and becomes a quick process. See https://www.talkphotography.co.uk/tutorials/focus-stacking-–-getting-everything-in-focus.150/

7. The camera must always be on a good, solid tripod for any type of product photography, it needs to be solid to prevent camera shake (which becomes magnified with tiny subjects) and as the first step is always to get the camera position right, you'll never get consistently good results hand-held.

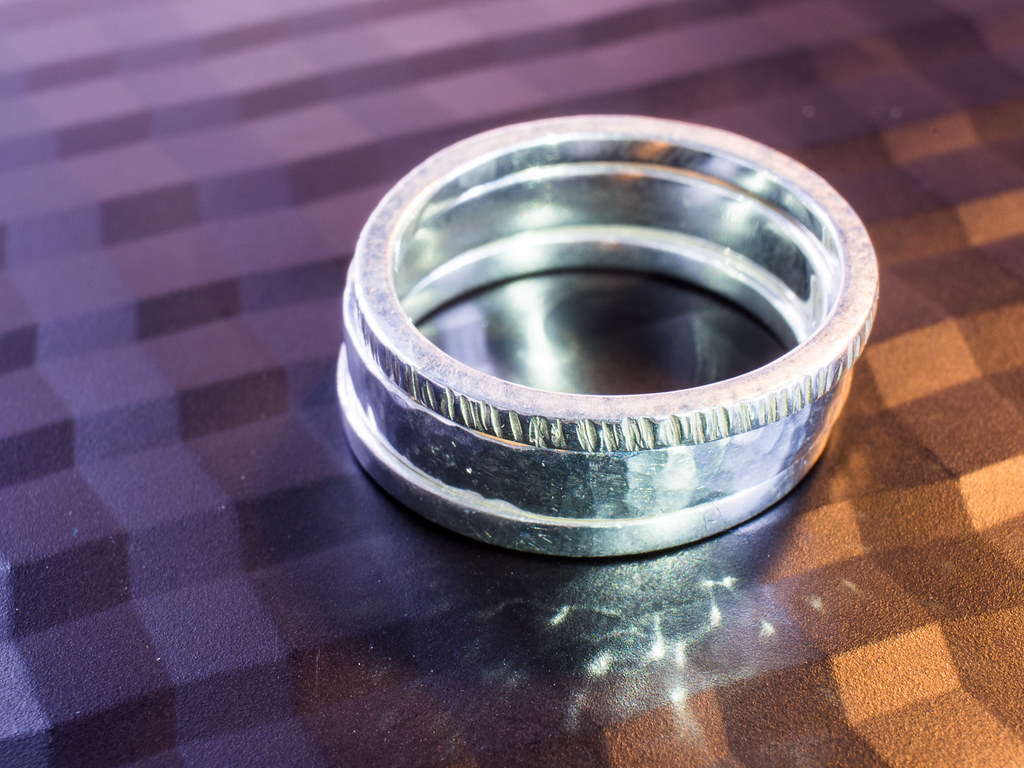
8. Never use a textured background for this type of shot, it always looks horrible. Use smoked glass if you want to create semi-reflections, use something matt but very smooth if you don't. The background (as well as the product) will need to be scrupulously clean. There are still some people out there who seem to think that panel wipe is for cleaning paintwork before re-painting it and it does work for that too, but I've always used it for cleaning products and their backgrounds:)

9. Black is nearly always the best background for this type of product. One of the problems with your "professional" example is that a weird colour ( b a s t a r d amber) was used, and this always results in colour pollution reflected on to the product.

10. Another way of dealing with the background is to photograph on black (to prevent uncontrolled and unwanted light reflected on to the product) and then to cut the subject out in Photoshop. This may seem to be a complicated way of doing things but the results are excellent and of course you can also add a shadow and / or a reflection if required. It takes very little time with practice and is the standard professional way of doing it.

That should get you started, if you have any questions please ask.
 
Have you considered a digital microscope? Not to replace the camera, although you can adapt the lens I suppose, but you can get some nice shots out of them with good lights.

The cheap ones have a working range of between 10mm and 200mm and produce something like a theoretical x20 zoom. When hooked up to a 30" monitor that's a lot more than 1:1. The one I have takes photos at 12MP, 4k/3k. Reasonably sharp. Needs TONS of light and has an incredibly short depth of field. Like 1mm or less depending on how close you are.

Water mist droplets on jewellery in micro shots with the right lighting would look amazing.
 
Hi.

I find that shooting your images on small black backdrops is the most alluring in my view. Even better is a black backdrop with a black glass or perspex sheet is beautiful with the reflections, as long as it doesn't cram in too much detail, (that would be distracting).

The drawback is that if you are using eBay, Etsy or other similar platforms they insist on white backgrounds and the reason for this is that Google search has an algorithm that is looking for as much of a white backdrop as possible to increase the viewing stats, and get as many eyes on your product as possible. If you are shooting for your own website, the same would apply, I would think.

If you are happy with lower image and page views, then I would be creative and stage your shoots as appealing as you see fit. If I was you I would post 2 listing on eBay of the same product with two different setups and see which brings in the most views. Bear in mind that you could list an item on one Sunday and the following Sunday with completely differing results, due to seasonal changes.

The best time to start a listing on eBay is Sunday night at 8pm local time, that is when most people start to search for products.

The attached picture is not the best, but it gives you an idea of my shots when done in a hurry. That's because I work as an eBay Lister, and we are targeted on getting the most listings done per hour, so we sacrifice quality vs quantity.

DSC06189.JPG
 
Last edited:
Well, that's an interesting viewpoint, thanks for sharing it.

I don't know about Etsy but I do know that eBay doesn't insist on white backgrounds. Amazon sort of does, for the main picture, but when the subject is white or nearly white then they accept that a white background isn't feasible.

What I do agree with is that sellers should experiment with different listings for the same items, and these variables should include different descriptions, prices, keywords as well as different photos,

In my experience, when the subject really doesn't suit a while background the best approach is often to shoot against a grey background for the main pic, with the other shots against a background that really does suit the subject.

As for your example photo, I don't even know what it depicts. Presumably it's either a bracelet or a neckless, but I can't tell because they're nothing with which to scale it. It's also very unevenly arranged, the contrast is poor and it's unsharp and badly lit so, although I agree with you that sometimes we need to compromise on quality in order to gain speed, there are limits to the level of sacrifice,

Right now (well, tomorrow anyway) I'm shooting a range of products for a small business, all of which are sold on eBay, Amazon and their website, and will try to get a good balance between speed and quality, because there's no point in listing hundreds of products that don't sell because of bad photography. Often (and in this case) the answer is to concentrate resources on the best selling or unique products and drop the odd items that aren't popular - which also saves a great deal of time and effort on listings, warehouse space, stock issues, cash tied up in stock and so on.

Within the next few weeks I plan to post a tutorial on here showing my approach to this type of repetitive photography.
 
Hi Gary.

Thanks for your response, it's so helpful.

As for speed, that's out of my hands at work because speed is the requirement and I can say it does cause unsold stock. Currently, due to space and COVID issues I work from home and even in the office there seems to be no incentive to invest in proper cameras or equipment.

Last year we were given a course organized by eBay, and they told us that we must shoot on white backgrounds as much as possible as described in my first post. For a while I took your view that I could be creative with background and just having the main picture as white. I'm not sure if it made a difference.

I'm still learning, and I tend to bleach out pictures, so I keep experimenting.

My table-top studio comprises two fixed intensity side LED lights, (5500K approx), on angle poise arms providing back lighting, an LED above which has adjustable light and hue settings, again on an anglepoise arm, and on some subjects I use a fill flash speedlight mounted on the camera with a Pringle tin cut as a down reflector, as well as reflector cards cut from white or black foam board.

I crop close to the subject because that's what eBay told us to do on the course. I know it zooms in too far.

Any other comments are welcome.

Kind regards.
 
Hi Paul,

Sadly, you're not alone with your problems, it's far too common for employers not to value photography, They'll spend vast amounts on things that don't matter and virtually nothing on the things that really do.

As for eBay advice, these people are the experts on listings (although I suspect that their main role may be to sell their promotion services) but they know nothing about photography. I had the same conversation with them just a couple of weeks ago, because I'm involved with a charity that sells on eBay, and was told the same thing - white backgrounds good, anything else bad, which makes as much sense as that famous line in "Animal Farm" - "Four legs good, two legs bad". eBay is just trying to copy Amazon and look slick. We tend to go for white backgrounds for just about everything as a thumbnail pic, both on websites and everywhere else, just to get consistency and a clean look, but once people have become interested enough to look more closely they need the backgrounds that show the product at its best.

And, even if the background does need to be white, professional product photographers tend to shoot against black or grey and then cut the subject out to white, this produces pure white and doesn't allow the 'white' background to destroy the fine detail and destroy the lighting effect.

But, unless your employers have the sense to appreciate the need to spend money on doing the job properly this all becomes academic, so let's look at what you CAN do within the limitations imposed on you . .. .

LED lights are a very poor choice for almost all types of product photography, but are especially bad for jewellery because they are physically far too big; small, shiny subjects need hard lighting, and this means flash heads fitted with modifiers that make the light smaller and harder, these modifiers are usually adapted by hand from Cinefoil. Move your light much further away, which will make it much smaller and harder, and which will also reduce light falloff over subject distance.

And there's only one sun, so in terms of lighting we should only use one light whenever possible. Even when more than one light is used, the main (key) light does about 90% of the work and any extra lights just fill in unlit areas if and when necessary. You're using far too many lights in the mistaken belief that they are needed. For most jewellery subjects, one light and, if needed, a reflector, is all that's needed.

There are other "tricks of the trade" of course, and a simple but effective one is to scrunch up some small pieces of kitchen foil, shiny side up, into tiny balls that can be placed just out of shot to create specular reflections where they are needed.

And, if you can get your employers to spend anything at all, suggest that they spend a whole £4.99 on a book called "Product Photography Magic" sold on Amazon, written by a miserable old git called Garry Edwards . . .
The best £4.99 they will have spent on photography by far.
 
Hi Gary.

I have already got the book it's great, but I haven't had time to go right through it yet.

Thanks as ever for your valuable advice.
 
Back
Top