
You are using an out of date browser. It may not display this or other websites correctly.
You should upgrade or use an alternative browser.
You should upgrade or use an alternative browser.
Just like life, one shaft after another (build log, video added)
- Thread starter Rob 80386
- Start date
OP
- Messages
- 6,382
- Name
- Emily
- Edit My Images
- No
Ah, you've taken it off to paint.
No doubt to avoid little black footprints in all the cars tomorrow morning.
Have you got a completion date in sight yet?
Nawty cup

I hope to finish it around the end of this month or the begining of next month
Forbiddenbiker
The Enforcer
- Messages
- 11,048
- Name
- Adam
- Edit My Images
- Yes
Glad you know where its all going Em ... 

I just had this wee thought of cats with dinky car shoes racing around while everyone sleeps...
Then I remembered what cars your talking about. lol
Ah, you've taken it off to paint.
No doubt to avoid little black footprints in all the cars tomorrow morning.
I just had this wee thought of cats with dinky car shoes racing around while everyone sleeps...
Then I remembered what cars your talking about. lol
OP
- Messages
- 6,382
- Name
- Emily
- Edit My Images
- No
Glad you know where its all going Em ...
I just had this wee thought of cats with dinky car shoes racing around while everyone sleeps...
Then I remembered what cars your talking about. lol
:bonk:

I've kept that cup away from my
 's
's 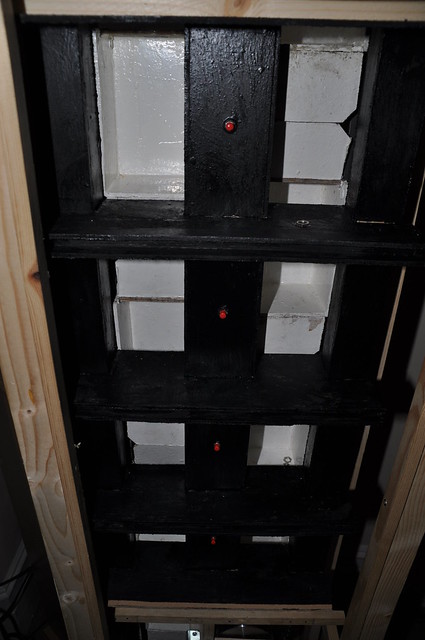
OP
- Messages
- 6,382
- Name
- Emily
- Edit My Images
- No
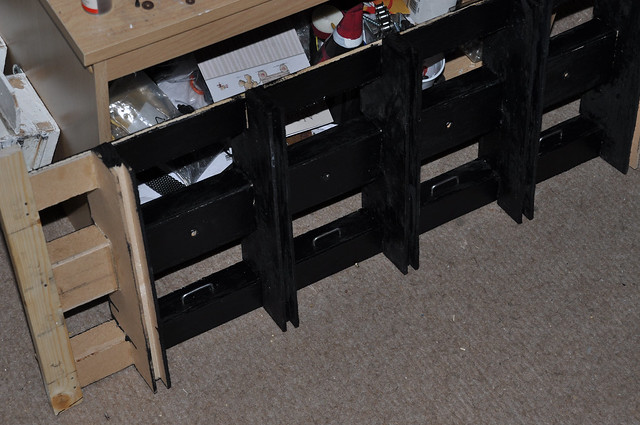
decisions decisions about what materials to use when it comes to boarding up the sides of the hoistway (tower), I have decided to recycle an old wardrobe standing at the end of my hallway, it's doing nothing, full of clutter and taking up space.
Tori_T
Admin
- Messages
- 6,580
- Edit My Images
- Yes
If you upgrade the battery, you'll have:decisions decisions about what materials to use when it comes to boarding up the sides of the hoistway (tower), I have decided to recycle an old wardrobe standing at the end of my hallway, it's doing nothing, full of clutter and taking up space.
The Li-ion, the Winch, and The Wardrobe...

- Messages
- 115,214
- Name
- The real Chris
- Edit My Images
- No
Looking good Robily
I just don't know what to say Vicky.:shake:
That was bad even for you.
If you upgrade the battery, you'll have:
The Li-ion, the Winch, and The Wardrobe...
I just don't know what to say Vicky.:shake:
That was bad even for you.
Forbiddenbiker
The Enforcer
- Messages
- 11,048
- Name
- Adam
- Edit My Images
- Yes
but its so bad its good. Lovin the buttons Em, your gonna have to build another box for all the clutter now.
OP
- Messages
- 6,382
- Name
- Emily
- Edit My Images
- No
If you upgrade the battery, you'll have:
The Li-ion, the Winch, and The Wardrobe...
wawawaaaa
Looking good Robily
I just don't know what to say Vicky.:shake:
That was bad even for you.
cheers Chris
Lovin the buttons Em, your gonna have to build another box for all the clutter now.
Cheers Adam, I still have an empty ottoman in the bedroom for that lot
Forbiddenbiker
The Enforcer
- Messages
- 11,048
- Name
- Adam
- Edit My Images
- Yes
Ooh ! Its all in the details.
- Messages
- 392
- Edit My Images
- No
Fascinating read - and well done.
If I recall, many moons ago, one of the tower blocks (Geography?) at Birmingham University used to have a paternoster installed, and it was a pleasure to ride. There were no signs warning about travel over the top - even though it is not dangerous, but I never plucked up the courage.
I look forward to seeing the final video.
Regards,
White.
- Messages
- 1,454
- Name
- Gary
- Edit My Images
- No
Hold on
Hang on a minute
Can you let go of this?
Run out of handle jokes...
So I think you should start looking at refining the process to make this cost viable because there are going to be plenty of people on here that want one for their house now!
Hang on a minute
Can you let go of this?
Run out of handle jokes...
So I think you should start looking at refining the process to make this cost viable because there are going to be plenty of people on here that want one for their house now!
OP
- Messages
- 6,382
- Name
- Emily
- Edit My Images
- No
Hold on
Hang on a minute
Can you let go of this?
Run out of handle jokes...
So I think you should start looking at refining the process to make this cost viable because there are going to be plenty of people on here that want one for their house now!
Cheers Gary
the only thing that cost the most money was the drive components and battery, the wood was fairly cheap
the only thing is most of the components had to be hand made (shunt rings, cabins, drive component rails, floors, centre tree, centre post and hoistway)
all the plans are on a flash pen, plus two disk drives
Tori_T
Admin
- Messages
- 6,580
- Edit My Images
- Yes
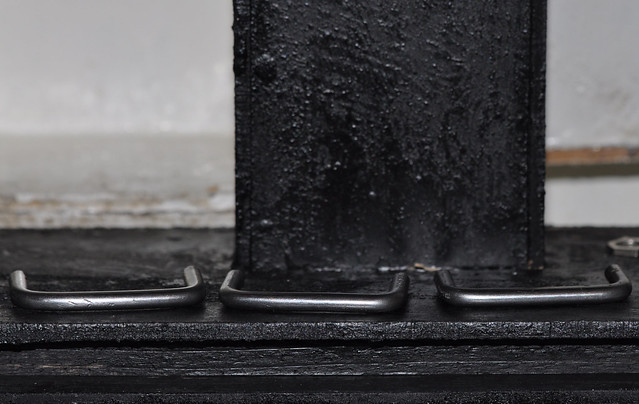
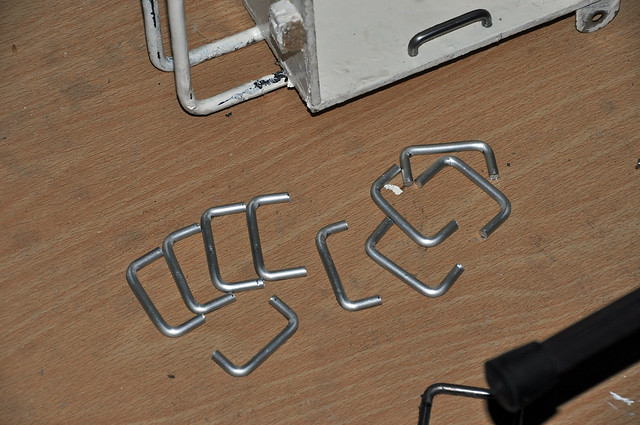
If the cabins have to come out, I can see Mr Cup making a break for it...I can get 14 from each rod, only 10 more to make, the cabins have to come out so the handles can be fixed on

OP
- Messages
- 6,382
- Name
- Emily
- Edit My Images
- No
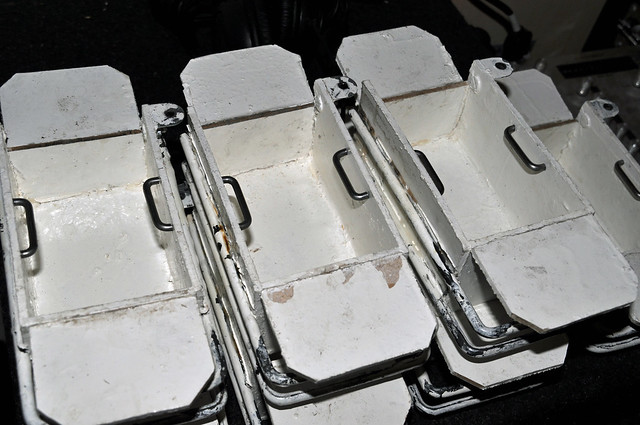
If the cabins have to come out, I can see Mr Cup making a break for it...
He already did, but got caught in the drive chain at the bottom, ended up between the two shafts
OP
- Messages
- 6,382
- Name
- Emily
- Edit My Images
- No
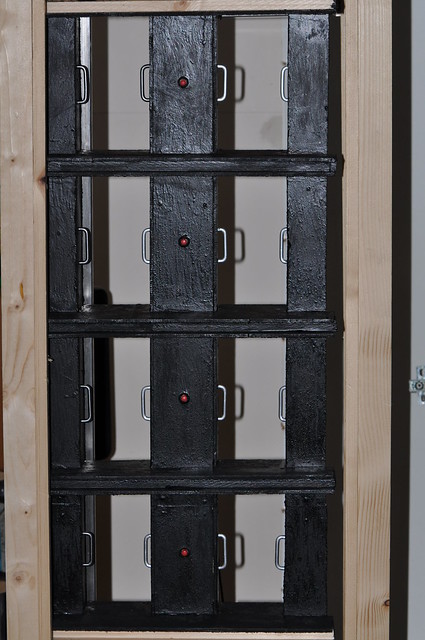
Cabins cabins everywhere !!!
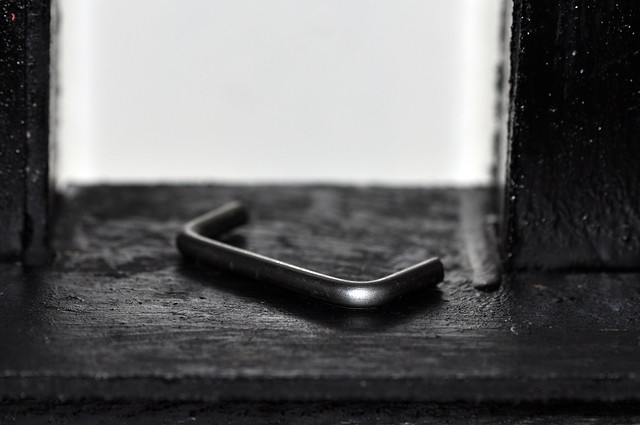
I handled it, until I run out due to miscounting how many I needed, had to make some new ones, but couldn't get hold of the metal rod I used previously, none available, so had to use aluminium rod 4mm diameter.
Hoistway has 4 handles in place
I handled it, until I run out due to miscounting how many I needed, had to make some new ones, but couldn't get hold of the metal rod I used previously, none available, so had to use aluminium rod 4mm diameter.
Hoistway has 4 handles in place
Last edited:
Forbiddenbiker
The Enforcer
- Messages
- 11,048
- Name
- Adam
- Edit My Images
- Yes
Looks real good Em.
OP
- Messages
- 6,382
- Name
- Emily
- Edit My Images
- No
All cabins are installed, I did notice a problem with one of the guide rails, it's to do with the terry clip at the top of the hoistway, after re-jigging the front chain anchors and replacing the first lock nut with 2 washers, test run wise it's fine
OP
- Messages
- 6,382
- Name
- Emily
- Edit My Images
- No
I'm upgrading the bearing blocks and bearings, as the wooden ones are wearing out too quickly, there is a pronounced skew on the sprockets (not good), the whole overhead drive assembly has to come out to be re-aligned, I will do that once the new bearings and blocks have been fittled.
OP
- Messages
- 6,382
- Name
- Emily
- Edit My Images
- No
I can see the cup wanting his 2p back
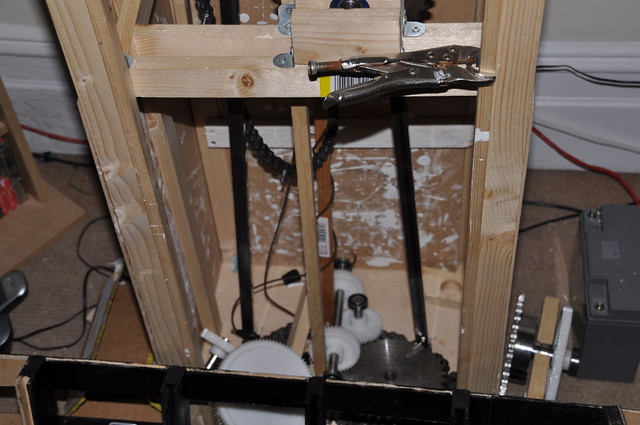
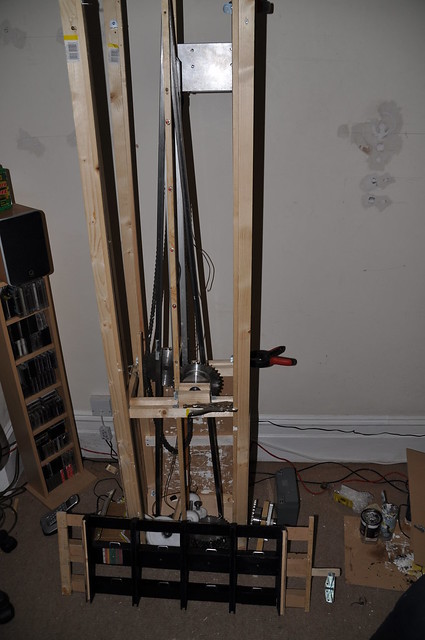
Looks like the overhead drive crashed into the pit, although that didn't happen as it would have wrecked everything going down.
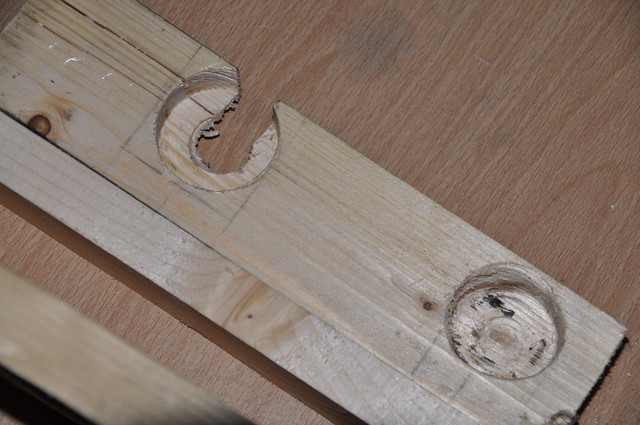
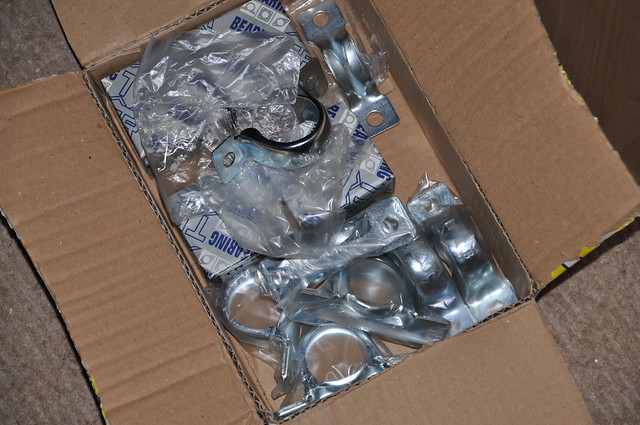
Nawtieeee...... the cause of the problem, this bearing block made of wood, has worn out and split, causing a twist.
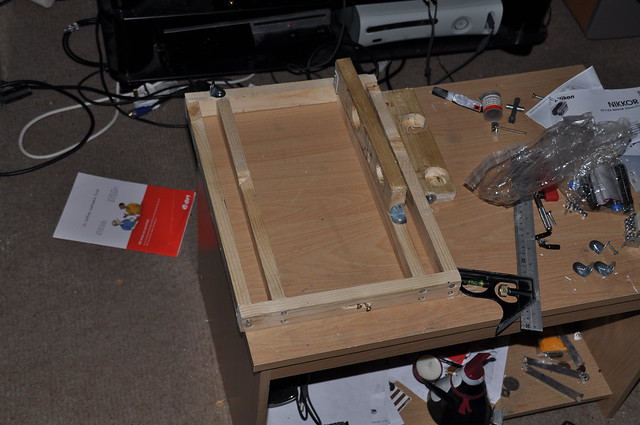
I had to square up the overhead rails, as the weight of the sprockets skewed the frame, it also has a new pillow block in the picture, to be measured up before installing.
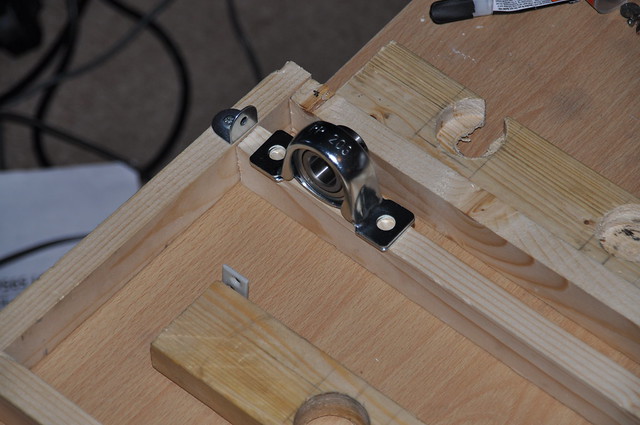
Pillow blocks
Tori_T
Admin
- Messages
- 6,580
- Edit My Images
- Yes
Knowing his luck, he's underneath that lot.
I can see the cup wanting his 2p back

ETA: Would it be a lot of work to place the drive unit at the bottom of the shafts, so there'd be less to come crashing down on everything in the event of a catastrophic structural failure?
Last edited:
OP
- Messages
- 6,382
- Name
- Emily
- Edit My Images
- No
Knowing his luck, he's underneath that lot.
ETA: Would it be a lot of work to place the drive unit at the bottom of the shafts, so there'd be less to come crashing down on everything in the event of a catastrophic structural failure?
It's more work than is really needed, as the overheads weigh about the same as the free running sprockets, but it's all looking good, squared up again
- Messages
- 620
- Name
- Mary
- Edit My Images
- No
Rob 80386 said:It's more work than is really needed, as the overheads weigh about the same as the free running sprockets, but it's all looking good, squared up again
This is an amazing project - from inception to completion! Are you going to exhibit it when you have done the final tweaks?
OP
- Messages
- 6,382
- Name
- Emily
- Edit My Images
- No
Updates updates...... News just in
The drive upgrade is going to plan..... Famous last words.
The pinwheel and long drive shaft, that links the front and rear chains, have been installed, waiting for 3 more 17mm bearings, the supplier run out of stock.
I have one already installed onto the sprocket shaft.
The drive upgrade is going to plan..... Famous last words.
The pinwheel and long drive shaft, that links the front and rear chains, have been installed, waiting for 3 more 17mm bearings, the supplier run out of stock.
I have one already installed onto the sprocket shaft.
Forbiddenbiker
The Enforcer
- Messages
- 11,048
- Name
- Adam
- Edit My Images
- Yes
lol @ famous last words.
I'm not worried you can just fix it again I'm sure.
I'm not worried you can just fix it again I'm sure.