Polaroid 110A 4x5 Conversion

I like the magnets idea. A couple of years ago, a Polish company announced plans for a large format camera which had the rotating back held in place with strong magnets.

Old hard drives are a good source of strong magnets.


Steve.
 
Thanks Steve, good call with the HDD magnets. I've got a batch of 1.5mmx6mm neodymium magnets that I've been using but the larger rectangular magnets in HDDs might prove useful.

Cheers
Steve
 
I managed to grab a bit of time over lunch to finish off my card templates for covering the inside of the camera doors. I've decided to use some wide elastic between the left side and rear doors so that the main flat rear door can be opened independently to update the film tracker then spring back down over the DDS. That should keep the whole door assembly looking neat and remove the need for any external fixings :0)

I started by re-painting the inside of the doors black so any visible edges are tidy.

ImageUploadedByTalk Photography Forums1441986118.824230.jpg

After that I've cut the card templates and added two corner pieces so when I cover it I will leave a small slot in the suede to slide the film tracker into.

ImageUploadedByTalk Photography Forums1441986164.829210.jpg

It took some pretty high heat from the hairdryer (and singed hands!) to get the last of the original covering off the back. I don't know what glue they used but it's seriously strong!

ImageUploadedByTalk Photography Forums1441986208.534483.jpg

Lastly I filled/sanded the new mdf corner section so it fits in with the lines of the body. I've ground it back by a couple of mm so the leather covering will sit flush with the chrome edges. After that I primed it to check for lumps and edges before sanding smooth and giving it a coat of flat black so again, any edges showing around the leather skin will blend in.

ImageUploadedByTalk Photography Forums1441986374.033431.jpg

ImageUploadedByTalk Photography Forums1441986385.388342.jpg

Cheers
Steve
 
Last edited:
I nipped down to our local haber..haba...habbar...material shop and picked up two real leather remnants earlier. One is black and the other is white. I didn't want blingy white leather, just liked the light grey suede back of it ;0)

After cutting out the interior trim pieces from the White leather and glueing them into the camera I decided I didn't like it so ripped them all out again in a huff :0).

I've just cut the trim pieces out of the black leather instead and much prefer the dark grey suede backing.

ImageUploadedByTalk Photography Forums1442079456.407729.jpg

I haven't attached the trim piece in the middle yet because I still need to grind off the old external switch panel but I'm liking it so far.
 
Forgot to say that I've also bonded a 75mm wide strip of black elastic onto the inside of the main rear door (under the trim panel). This will then be stretched and bonded to the other rear door to act as a return spring when the rear door is hinged open.
 
Just want to say thanks to everyone who told me to stick with a traditional black leather skin. I've just skinned each end of the 110 and am loving the look of black and chrome;

ImageUploadedByTalk Photography Forums1442091712.931317.jpg

ImageUploadedByTalk Photography Forums1442091721.534098.jpg

ImageUploadedByTalk Photography Forums1442091729.521380.jpg

ImageUploadedByTalk Photography Forums1442091738.408894.jpg

ImageUploadedByTalk Photography Forums1442091754.500544.jpg

I need to get some more glue to finish the rest of the panels so will carry on with them over the next few days.

Cheers
Steve
 
Last update of the weekend. I've just finished trimming for tonight. Started by cutting out the now redundant switch surround off the left side door. Easiest way was to drill it out all around.

ImageUploadedByTalk Photography Forums1442175991.673745.jpg

Once that was removed I bonded a curved piece of plastic on the underside (funnily enough cut from a Zenit E body cap!) and filled over the top. I then finished by sanding it smooth.

ImageUploadedByTalk Photography Forums1442176098.441715.jpg

Once the door was smooth I started trimming the rear door. I've bonded the original switch panel back into the door so it looks original although it's not actually doing anything :0)

ImageUploadedByTalk Photography Forums1442176157.571073.jpg

After that I trimmed the left rear door and refitted them to the camera body.

ImageUploadedByTalk Photography Forums1442176277.111985.jpg

Now all I need to do is wait for my ground glass to arrive so I can adjust the infinity focus. I'll need to drill out the rivets holding the front standard in place to do that so I can't cover the front panel until that's done.

ImageUploadedByTalk Photography Forums1442176414.078816.jpg

Cheers
Steve
 
I really can't wait to this complete and in action. It's brilliant.(y)
 
Me either mate. I just need to wait for the postie to bring my Ground Glass then I can get on with actually testing it out! Annoyingly, the postal method only tracked it within Lithuania so I know it's somewhere within the UK now but not sure where!
 
Speak of the devil, came home to my new ground glass! For £18 I've got a custom sized perfectly ground glass shipped inside it's own wooden box and wrapped in card, I'd definitely recommend the Ebay seller :0)

I've just held the GGS to the back of the camera around 10mm back from the original film plane and the image should cover the entire 4x5 sheet with no vignetting so should be spot on.

This is the seller if anyone's looking for a custom GGS;

http://www.ebay.co.uk/sch/virgisst/m.html?_nkw=&_armrs=1&_ipg=&_from=
 
Last edited:
This ground glass is so good it even shows the image the right way around...

ImageUploadedByTalk Photography Forums1442257386.859759.jpg

Well, maybe not but I'm happy with the brightness even without the shade and just held over the back of the camera. The vignette around the edge isn't actually dark in reality but the iPhone didn't capture it very well ;0)
 
Just grabbed some more shots now that the interior is fully trimmed. Only the front panel left to do now once I've sorted out the infinity focus :0)

The rear door is springing back nicely with the elastic embedded under the trim panels.

ImageUploadedByTalk Photography Forums1442267555.160413.jpg

ImageUploadedByTalk Photography Forums1442267562.412489.jpg

ImageUploadedByTalk Photography Forums1442267591.760111.jpg

ImageUploadedByTalk Photography Forums1442267601.432611.jpg

ImageUploadedByTalk Photography Forums1442267608.835549.jpg

Cheers
Steve
 
Are you still going to have the (removable) top mounted viewfinder or are you going to frame and focus using the ground glass?
 
Last edited:
I've got both. The magnetic viewfinder is housed in the small storage area inside the rear door and I'll be embedding magnets in the top plate. The viewfinder will only be for general framing whereas the ground glass will give me a proper focussing method.
 
I've just tested focus by adding a couple of strips of 5mm seal to the rear body then taped the ground glass over them to give the equivalent film plane. Looking at minimum/infinity focussing i think the front standard will need to move back around 7mm in total which should be within the built in tolerances once I drill out the two front rivets :0)

Tried to take a couple of shots but the actual appearance is much better than these give.

ImageUploadedByTalk Photography Forums1442398584.551751.jpg

ImageUploadedByTalk Photography Forums1442398592.788356.jpg

ImageUploadedByTalk Photography Forums1442398600.425187.jpg

These were all shot at the minimum focus distance (0.9m) with the lens wide open at F4.5. The first two are with the window to the right and the last is with the window behind the subject giving strong backlight.
 
This is an amazing thread, but I'm struggling to imagine what it's going to look like (eg from the side) when done and open, particularly give some of the remarks about moving stuff about for infinity focus!
 
Give me 10 minutes and I'll grab a couple of shots. The movement required is just to the front lens standard back by 7mm towards the film plane to account for it being moved backwards from its original position.
 
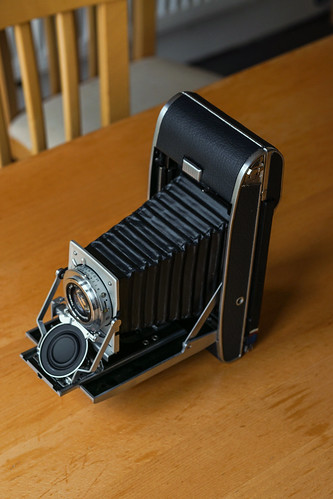
Here you go Chris. This is what the camera looks like with the bellows extended and the double dark slide (film holder) installed;


20845259803_b1b063e431.jpg


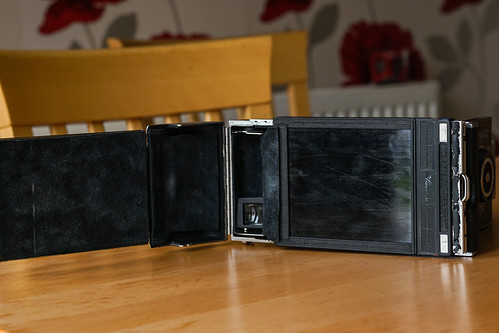
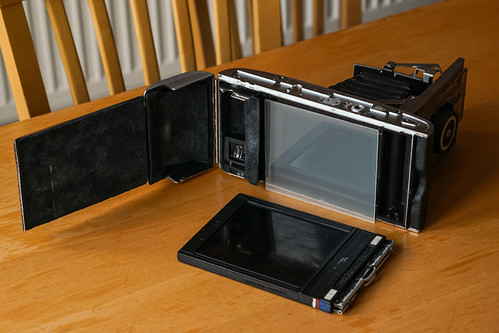
The DDS clips in the u-shaped channel on the left and then locks into two slots in the metal film back with friction;

21440149726_be03d8c703.jpg

21278549558_b583646da3.jpg


I've propped the ground glass up to show roughly where the actual film plane is. The glass will be held within a custom holder which has the same dimensions as the double dark slide so it can be clipped into place for framing/focussing;

21279451759_3cc608945a.jpg


The rear door is in two hinged-sections. The left-side door is hinged from the edge of the body and is held in place with an embedded magnet to create a small storage area (where the removable viewfinder and remote release are kept. Then, the rectangular rear door is hinged off that and is sprung using wide elastic under the trim panels so it springs back down against the DDS.

This is the front lens standard that will need to be moved back by around 7mm. It's hard to show in a photo but the raised lip in the middle of the lens rail is where the front lens standard clips on. The entire chrome section at the front is held in place with 2 rivets and two screws in an adjustable channel. By drilling out the rivets and loosening the screws I can slide the entire chrome section back by 7mm which means that the lens is moved back that far too.

21466328945_795a1b0b45.jpg


p.s. Ignore the dusty bellows, that's my next job ;0)

Cheers
Steve
 
Last edited:
Cheers mate. Funnily enough, I did see that @RaglanSurf 's mate Rocky is selling a Polaroid 900 for £20...the 900 has a 'Magic Eye' lens which is basically an auto-exposure so would ideally need to be swapped out for a proper lens but the rest of the body is pretty much identical to the 110.

I've really enjoyed building this though so could be tempted to do another if you fancied supplying the donor :)
 
Haha :D

I must admit, when I saw the first pictures from the front, I did wonder to myself 'hmm, I wonder if a LF lens could be mounted in that front standard...'

That said, I have an old kiev 88 6x6 back here... I think I want to try to make one of those hybrid cameras that someone posted a link to a while back; the whole LF lens modded onto a MF film back thinger. Might get some more Ebony blanks once this Ph.D is done and make myself a nice little MF camera and call it the Mebony or something equally silly :D
 
Lol, that was me that posted those links ;0) If I hadn't have got this far with the 110 I'd be tempted to use its lens on a Kiev back.

Oh was it?! Sorry chap, my bad :D

Only down side with making something like that with a MF back though is the cost of the lens. Looking at about £2-300 for a Nikkor 65mm or 75mm LF lens :(
 
No problem mate, there are a lot of posts :0)

I've wondered about how to mount the LF lens with such a short flange from the back and still get a usable image? I assume the mega-bucks LF lenses have a much shorter focal plane?
 
Yeah sorry, wasn't the best explanation! Some of the diy cameras I've seen have the lens mounted directly to the front face of the Kiev back which means there has to only be maybe 10mm between the rear of the lens and the film plane so I don't see how that can focus? Some of the others have got bellows mounted to the front but they don't look as neat.
 
Oh I see! I'm not sure tbh. All I do know if that for infinity focus, the lens focal plane needs to be the focal length in mm away from the film plane. Someone more versed in the ways of LF lens focusing might be more adept at answering than I. In any case, mounting the lens closer than the infinity focus won't work. to focus closer than infinity, the lens needs to be moved away from the film plane.

Indeed, some LF lenses do have incredibly short rear lens groups, so perhaps that's all it is?
 
Last edited:
Sounds like a pretty reasonable explanation. I guess it calls for some Google-fu to find the lens options. The simplest would be to take the lens/bellows off a folder and mount the Kiev back to the same film plane as the original. The problem is that you still end up with a folder that just has a different back.

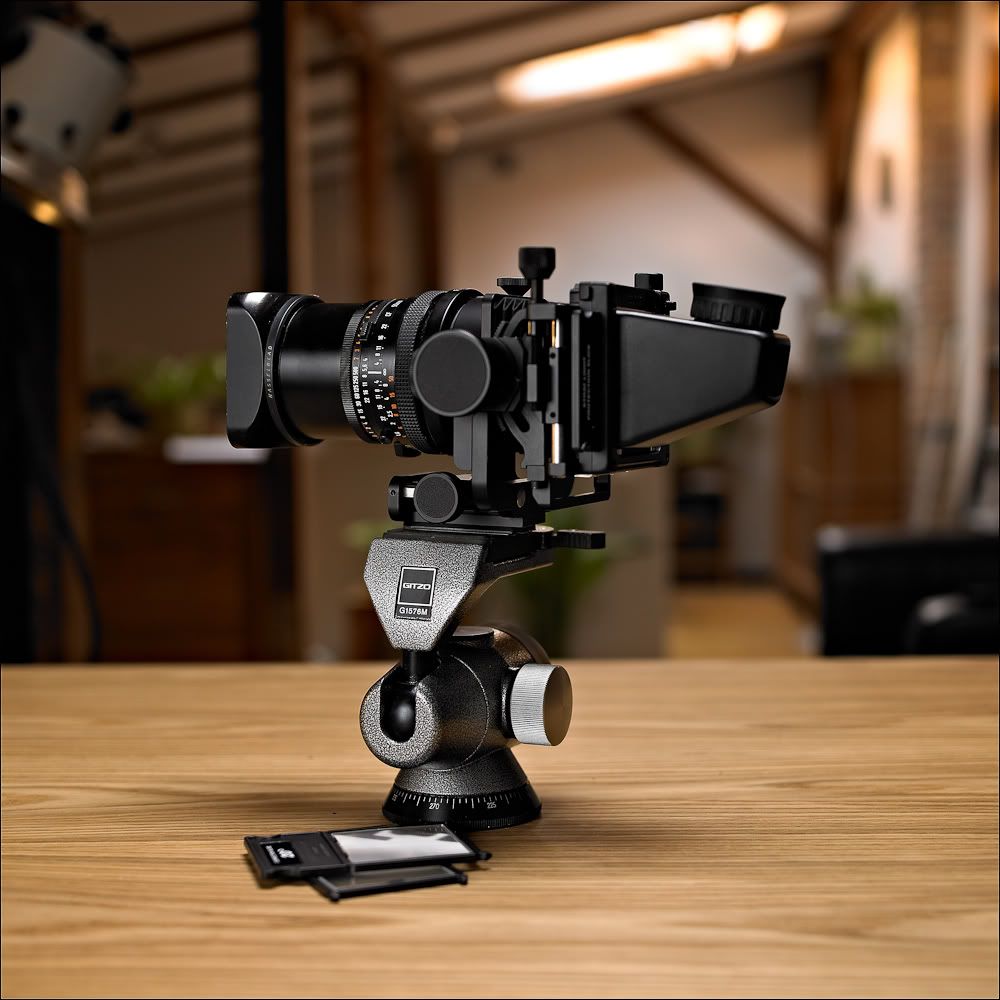
ImageUploadedByTalk Photography Forums1442421236.958723.jpg


I'd like something like this but like you say, I'm assuming a suitable lens won't be cheap.

ImageUploadedByTalk Photography Forums1442421350.714434.jpg
 
Oh and here's a side by side comparison with my TLR for size;

View attachment 46609

Not quite 'pocketable' but certainly more manageable than alternative 4x5's ;0)

Steve thanks, much easier to visualise now. I hadn't realised quite how mahoosive it was (although presumably that 635 is rather smaller than most TLRs). What's the focal length? Looking like about 125mm, presumably still a bit wider than standard for 4*5?
 
Back
Top