

robhooley167
Sir, my fingers are stuck together
- Messages
- 4,147
- Name
- Rob
- Edit My Images
- Yes
This is a follow on from the discussion in the Scanning film with a DSLR thread https://www.talkphotography.co.uk/threads/scanning-film-with-dslr.673380/, to avoid clogging that thread up.
An idea was concocted to use a 5x4 camera to scan it's own film using a DSLR mounted to the lens-board and a light-box on the back of the camera
Version one is being prototyped using an old MPP wooden double darkslide as a chassis. It certainly isn't going to win any design awards right now, but I'm constraining myself to make it fit in the footprint of a DDS, to avoid having to dismantle the camera to use it with a Graflok back.
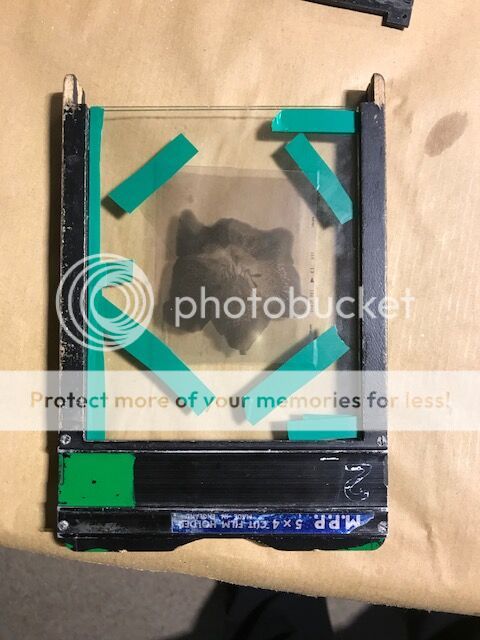
It uses two sheets of picture framing glass to sandwich the film, the fine texture on the glass should be sufficient to avoid the presence of Newton rings, glass is on both sides to enhance flatness.
The next challenge is fitting an illumination source behind the glass sandwich, I don't think LED panels can provide even illumination without a fairly thick diffuser, so I'm looking into a few alternatives.
For version two, the chassis will be custom made to fit slightly larger glass without increasing the external size of the unit, so that the sandwich can be slid in once the film has been added.
Unlike @stevelmx5 I'm not so good at CAD, but I'll try to add a few drawings over the next week or so.
An idea was concocted to use a 5x4 camera to scan it's own film using a DSLR mounted to the lens-board and a light-box on the back of the camera
Version one is being prototyped using an old MPP wooden double darkslide as a chassis. It certainly isn't going to win any design awards right now, but I'm constraining myself to make it fit in the footprint of a DDS, to avoid having to dismantle the camera to use it with a Graflok back.
It uses two sheets of picture framing glass to sandwich the film, the fine texture on the glass should be sufficient to avoid the presence of Newton rings, glass is on both sides to enhance flatness.
The next challenge is fitting an illumination source behind the glass sandwich, I don't think LED panels can provide even illumination without a fairly thick diffuser, so I'm looking into a few alternatives.
For version two, the chassis will be custom made to fit slightly larger glass without increasing the external size of the unit, so that the sandwich can be slid in once the film has been added.
Unlike @stevelmx5 I'm not so good at CAD, but I'll try to add a few drawings over the next week or so.
")