Show us your darkroom (and help setting up mine)

Messages
491
Name
MARINO
Edit My Images
No
Hey film gurus,

I'm looking for some tips, advice and also sharing my journey on setting up my first darkroom.
Boy oh boy it's been such a slow process but I'm getting there.

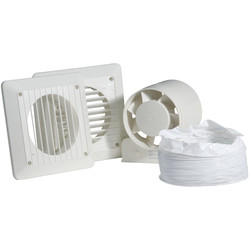
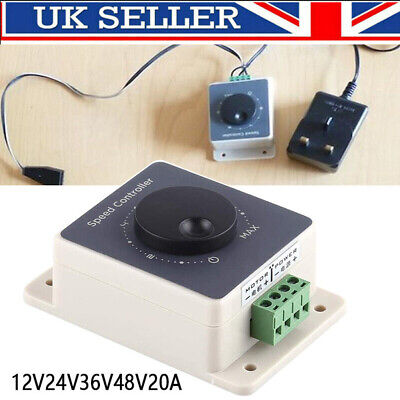
I have all the equipment (just waiting a couple more things to be posted and I'm ready to go).

Now i have to decide where to setup the darkroom.
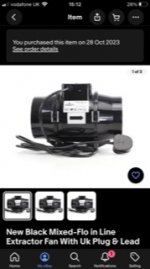
Garage is the most ideal as I''ll have the chemicals away from my 3year old.
I'm not sure if i have to keep the chemicals up to a certain temp when printing, but the garage gets really cold in winter.
Although I do have a radiator in the garage and sockets.
IMG_1246.jpgIMG_1248.jpg
IMG_1247.jpg

There's two windows in the garage but i cant think of how to cover the windows without getting beaten by the wife.
Maybe building something out of wood (wooden frame) and covering it with fabric?
waiting for your ideas and most importantly pictures of your setup.
 
More later, but I use extremely strong velco, adhesive on one side to stick to things, bought from Hobbycraft to support a similarly velcroed sheet of blackout material bought from Firstcall. If the velcro won't stick to the brick, which I expect would be the case, a wooden frame should work. Years ago, the blackout material was rolled up (like a blind) hidden behind a pelmet, and fastened at the edges when dropped.
 
Your garage is perfect for a darkroom.
You can work un-interrupted by the partner and child.
A true man cave.
I am jealous.
 
@StephenM helpful as usual, thanks. I looked up the material you’re talking about, and managed to find something cheaper on the internet.
@soupdragon I’m lucky, i know. This is where i do all my arts/crafts. As you correctly pointed out, uninterrupted ,away from wife and child:naughty:
 
Last edited:
I’ve progressed a bit today.
Managed to make a structure just from wood i had lying around. Also used a table i had to support the wood (good job i kept the table). I thought it was going to be a sloppy job but found charcoal paint I’ve bought a long time ago. Slapped quickly some paint to cover the monstrosity of a darkroom structure.
Just need to cover it now with something.
IMG_1289_adobe_express.jpeg
IMG_1291_adobe_express.jpeg
 
Last edited:
Thx for the info @auntiemaryscanary Hmm… late at night and still thinking about it. The height of the structure is 2 meters. Depth and width 1.4m. I’ll need 9 metres of material. It’s going to be expensive. Makes me wonder if there’s an alternative.
I looked up also thick plastic which is waaay cheaper, 17 pounds for all i need. The only problem is it’ll be like a sauna in the darkroom. And def need some sort of vent because the plastic will turn into a sauna. Also plastic is shiny, so not sure if it’s the right material?
I also thought about cardboard, really easy to find but I’ll be a pain to put it together without falling apart
 
My darkroom was constructed in the roof space. The house was actually built from scratch to have a room in the roof, and the builders for some reason chose to have a normal floor (solid beams, floorboards) in part of the roof not used by the room. This area was about 7 feet by 5 feet, enclosed on three sides already by the corridor, wall of the room and the brick wall. Adding uprights etc and plasterboard to all four walls, plus putting in a full size door, and the job was done. Plus no windows so only the door to blackout.

There is a shelf above the door, and the velco is fastened to this. Along the wall at the back are three floor standing kitchen cabinets (one a corner unit, the others small ones) with a worktop resting across them and the darkroom fridge under the work top. Along the wall on the left as I enter is another small cabinet with a work top running across it and the corner unit to the back wall.

This link to my OneDrive has a couple of short videos showing the inside, taken hand held using a Sony a7r2 camera with 15mm manually focused (but not during filming) lens. The second pans around the room, the first shows some cupboard contents... At the time, some reorganisation was in progress, No prizes for identifying the cameras on the LPL 5x4 enlarger baseboard.

BIG CAVEAT added on edit. Unless your computer is better than mine, you have to download to play them.

 
Last edited:
Re shiny material. Before investing in the Firstcall material (it's light cream, and can be seen folded in the video I think in the corner on the bench) I used plastic sheeting from a garden centre intended to suppress weeds. Two thicknesses worked fine. The reason for the switch was that it wasn't heavy enough to hang down properly and had to be adjusted. The new fabric hangs without having to fiddle around.
 
And a PS. There is a thead somewhere recommending darkroom books. I'll try to find it and edit this post. My top recommendation would be a book by Carson Graves, which I wish I'd had when I started. And as to winter tempertures - yes, they can matter as one developing agent doesn't develop below 54 degrees F. Dishwarmers used to be made to keep the chemicals up to temp.

Edit. See here for the link plus other useful ones:

 
Last edited:
Oooh I see possibly a Triang? . . . Anyway if it's B&W you just need a bench for the enlarger and a table for the three trays and the chemicals. One Red light and just ensure it is light proof and done ! . . . Then you could take the other half in there with you and see what develops (nudge nudge wink wink!!!).
 
My darkroom was constructed in the roof space. The house was actually built from scratch to have a room in the roof, and the builders for some reason chose to have a normal floor (solid beams, floorboards) in part of the roof not used by the room. This area was about 7 feet by 5 feet, enclosed on three sides already by the corridor, wall of the room and the brick wall. Adding uprights etc and plasterboard to all four walls, plus putting in a full size door, and the job was done. Plus no windows so only the door to blackout.

There is a shelf above the door, and the velco is fastened to this. Along the wall at the back are three floor standing kitchen cabinets (one a corner unit, the others small ones) with a worktop resting across them and the darkroom fridge under the work top. Along the wall on the left as I enter is another small cabinet with a work top running across it and the corner unit to the back wall.

This link to my OneDrive has a couple of short videos showing the inside, taken hand held using a Sony a7r2 camera with 15mm manually focused (but not during filming) lens. The second pans around the room, the first shows some cupboard contents... At the time, some reorganisation was in progress, No prizes for identifying the cameras on the LPL 5x4 enlarger baseboard.

BIG CAVEAT added on edit. Unless your computer is better than mine, you have to download to play them.

WOW , now that's what you call a darkroom and an awful lot of consumables / stuff. :)
 
To be honest, just looking at your pictures, you are basically there.
You have a flat (ish) surface above your lawn mower which is easily enough for an enlarger and three trays.
It seems all you need is some black out cloth over the windows and the door.
It shouldn't get too hot with brick walls either.
 
Last edited:
If you run with covering your structure the seconds version of the material is £4.95 a metre (1.45m wide). Or as @soupdragon says light proof windows and doors, maybe using the same seconds stuff.

I'm not keen on plastic - too easy to puncture/rip. Other solid materials worth considering are hardbound or plasterboard (both from £10 per 2.44 x1.22m, 8'x4 a sheet). Would give your structure some rigidity too.

I'll post pics my ventilation system later.
 
I think I noticed a small fan on the shelf over the door @StephenM ? Great idea if so, one that I shall pinch!
 
@StephenM wow, that’s a great setup. I didn’t notice the fan though. In my case I’ll definitely need one. Yes, I’ll also need a book to get me started.
@soupdragon in my case it wouldn’t be ideal to cover the windows. Wife gets in and out occasionally to grab the child’s pram and other stuff.

Well if i can’t figure out a cheap way to cover it I’ll get the stuff @auntiemaryscanary suggested.

What kind of fan should i be looking for ventilation?
 
This is a cheap extractor fan:

Of course you will need a light trap otherwise you'll have a 4" round window in your no longer dark room :)

I made this from 4" white ventilation fittings painted black inside and out.
rsz_img_20231002_093052506.jpg

My extractor is this, £20 from eBay
rsz_1img_20231002_093041584.jpg
It is 12vdc which suits me as I only have mains via an extension cable which I don't need to get out unless using the enlarger. It runs from a large leisure battery I got cheap but you can get mains to 12vdc converters for not much.

The fan is very powerful so I control it with one of these

The black ventilation pipe is also cheap (note: you have to search for it via "hydroponics" eBay listings). It's v tough and the inside is foil lined. Thinking about it 3 X 45 degree bends in the pipe should be sufficient to stop light travelling down.

Lots of options out there with a little lateral thinking.
 
Last edited:
The darkroom I used to use had a sink with running water to wash the prints down and then a line with pegs to hang them up to dry. Also a sign on the entry door to say developing in progress do not open was put up to prevent darkroom disasters!
 
The darkroom I used to use had a sink with running water to wash the prints down and then a line with pegs to hang them up to dry. Also a sign on the entry door to say developing in progress do not open was put up to prevent darkroom disasters!
It would be nice but I don't have piped water so use buckets and trays for print washing. My door is solid so a small internal catch keeps out intruders!
 
@Fixer what’s a Triang?
At the moment my other half is pregnant with our second child. Under no circumstances will i take her to the darkroom (two children us enough :LOL:)
Also good tip about a sign on the door to avoid any grief(although rarely anyone walks into the garage, especially at night).

@auntiemaryscanary yep, i thought about the light leak and your solution looks great. I think I’ll make something similar to yours.

Gentlemen i really appreciated your help!
 
(A Triang is a brand of very old children's toys. The ride-on-car looks similar to a Triang ride-on-car).
Another idea for you is to get some inexpensive PMR walkie talkies. One for you to have on you in the darkroom and one or more outside. This might save your phone from chemical fumes/accidents in the darkroom?!
 
I suspect keeping the temp right is going to be your biggest issue in the winter, dish warmers work but it's a lot easier to have the darkroom the right temp to start with. It's no fun standing on freezing cement and dipping your hands in water cold enough to make you want to visit the little boys room. And thats a big question, do you have a light trap door? At some point you'll need to go in and out without putting everything away. No matter how well planned you are there will be a drama just as your about to expose a sheet of paper.
 
@swanseamale47 yes that’s going to be a pain in the winter. Although i have a radiator in there and if i keep it on for an hour it actually keeps the garage warm. Still going to be a pain i think, trying to get the temp up. That’s going to have to be the last problem i have to deal with for now.

About the light trap door.
I’m confident it won’t be an issue (until im proven wrong). It’s really dark in the garage, even with the street lights, It’s a quiet cul-de-sac. Thanks for pointing that out
 
IMG_1576_adobe_express.jpeg
Ended up using plywood. I’ll cover half the entrance with plywood and then the other half with a blackout material to make my life easier.
Any ideas about how i should put the blackout material in a way that light seals the entrance? Stephen said adhesive Velcro, but will it stick ok to the fabric?
 
Stephen said adhesive Velcro, but will it stick ok to the fabric?
Maybe, up to a point.

I'd get someone with a sewing machine to stitch the "eye" material to your curtain and use a staple gun to fix the hook material to the edges of the cabinet. You might want to think about how you'll open the curtain - good quality Velcro is quite "sticky" once closed and might be difficult to open from inside.

An alternative may be to use two layers of heavy black plastic sheeting with one layer fixed to (for example) the left and top and the other layer fixed to the right and top. That's how I made my own darkroom tent and it worked well for several years of continuous use.
 
Thx for the info Andrew. The plywood is 5mm thick so a good staple gun should be ok to go through it?
 
The plywood is 5mm thick so a good staple gun should be ok to go through it?
I wouldn't use a staple gun on 5mm plywood alone.

Won't you have a more solid frame? If you staple through the plywood into the frame, that would be OK, in my experience.
 
there’s no frame on the top. Don’t have to be fancy then just tiny nails.
I’ll put two curtains on either side overlapping each other as you suggested.
 
Any ideas about how i should put the blackout material in a way that light seals the entrance? Stephen said adhesive Velcro, but will it stick ok to the fabric?

Maybe not but you can get iron-on Velcro tape which will -- or sew it on ,:lol
 
Bought my first film camera and went for a walk around the park. Just had my first film developed.

Bill McLaren - The voice of rugby

View attachment 405061
Ended up using plywood. I’ll cover half the entrance with plywood and then the other half with a blackout material to make my life easier.
Any ideas about how i should put the blackout material in a way that light seals the entrance? Stephen said adhesive Velcro, but will it stick ok to the fabric?
When you've got the front/curtain finished check all the edges where the plywood joins to see if you've got any light coming in. If so get some brown frame sealant (or dark silicone) on those edges.
 
When you've got the front/curtain finished check all the edges where the plywood joins to see if you've got any light coming in. If so get some brown frame sealant (or dark silicone) on those edges.
Yep, was planning to get silicone for some gaps between the plywood to make it lightproof.
Ordered the blackout material from the place you suggested so hopefully next week i'll start asking questions about ventilation and chems:thinking: hehe
 
Good to see you went with the ply too. May be worth putting some framing to support the ply roof and the front as well. The front will benefit from some stability when you are pulling the velcro'd curtain on and off.

Fire away when you are ready to talk ventilation!
 
Yes, i might leave the roof as it is but definitely reinforce the front. Painted the inside all black so far and fixed the plywood in the front.
Could not help my self last nigh, I bought a vent from eBay.
IMG_1613.jpg
IMG_1614.jpg

IMG_1615.jpg
Ispecs says it moves
280 m3/hour.
and noise is 37db. If the specs are true then it sounds like it’s more than enough for the job. I’ll copy your fan setup :)

Getting there:banana::banana:
 

Attachments

  • IMG_1615.jpg
    IMG_1615.jpg
    17.3 KB · Views: 3
Looks good! Just remember to put some bends in vent pipe - and a length for an exit pipe too, that should keep the light coming in through the vents. That pump will be powerful, not sure if you can an AC speed controller.

Edit: you can

Would need to be outside the darkroom with all those lights! Or in a light proof box I guess.
 
Last edited:
Oh, the ply itself is light tight so didn't need painting. Mine is unpainted and there are no internal reflections when using the enlarger. Maybe worth a think of painting it internally a different colour. Black can be, er, a little depressing for longer periods. Anyway see how you go with the black.
 
@auntiemaryscanary thanks, you’ve been very helpful.
Hope the vent is not too powerful:geek::geek:. At least the fan speed control will sort it out.
About the black colour, i had the paint from a previous project and thought i should use it anyway. Also wasn’t sure if it’s meant to be black or not, decided to use it anyway. It doesn’t bother me at the moment but it’s good to know it doesn’t have to be black.

God this is taking forever:crying:
I just want to start printing (i sound like my 3 year old daughter)
 
Little and often, You will get there.
 
Late response re velcro. My blackout material is plasticised, rather than a clothing fabric, so the velcro does stick. Sewing would be a plan b.

On wall colours, it's usually recommended that the wall near the enlarger should be black, as white light comes from the enlarger and nowhere else (we hope) in a darkroom. Otherwise white or light to get the most out of the safelight, as you need to be able to see. In your darkroom, I imagine all the walls are near the enlarger. Mine has all white walls.
 
Just in passing. There are books, or chapters in books, available free from the Internet Archive archive.org on darkroom design.
 
Back
Top