and help to keep the site free for all
You are using an out of date browser. It may not display this or other websites correctly.
You should upgrade or use an alternative browser.
You should upgrade or use an alternative browser.
Tutorial Contrast Masking - an HDR alternative,
- Thread starter HIMUPNORTH
- Start date
Matt Sayle
2017MSA Young Photographer of the Year(Motorsport)
- Messages
- 18,976
- Name
- Matt Sayle
- Edit My Images
- Yes
I figured it out thanks for the help!
Yv
TPer Emerita
- Messages
- 25,725
- Name
- Yvonne, pronounced Eve...
- Edit My Images
- Yes
Doesn't seem to work or me. It al seems very dark. or very grey. where am i going wrong?
I have the invert filter as first layer
then b and W
Then orginal colour.
is that right?
Creat duplicate layer > ctrl and J
then Image menu > adjustments > invert
then on the layers panel on right, drop down box that by default says 'normal' and change it to overlay
then Filter menu, gaussian blur - for a full res image you should set this to about 80 pixels on the slider - but play around for best setting for each image
then go back to the layers panel and use opacity slider to adjust the level of the effect to a position you like
then Layers menu - flatten image
- Messages
- 5,178
- Name
- Gary
- Edit My Images
- Yes
You select the inverted layer Matt and change this to an overlay layer. HTH! 
EDIT: Oops, missed replies (working of email notification - must wake up! )
)
EDIT: Oops, missed replies (working of email notification - must wake up!
 )
)photon
Junior Member
- Messages
- 5,123
- Edit My Images
- Yes
A contrast masking script for Paint Shop Pro (not tried beyond v9):
http://pixelnook.home.comcast.net/~pixelnook/FotoFixer.htm
I usually edit it to drop the layer opacity to 40.
http://pixelnook.home.comcast.net/~pixelnook/FotoFixer.htm
I usually edit it to drop the layer opacity to 40.
- Messages
- 336
- Name
- Neil Smith
- Edit My Images
- No
Thanks for the tip Gary. I've never been fully convinced about HDR, but you're technique looks great. I will give it a go once I can get out with my camera!
- Messages
- 2,498
- Name
- Nathan Hulse
- Edit My Images
- Yes
I like this, after someone else posted a picture which used this technique and credite the thread. As just mentioned, need to watch for halo effects (depends on amount used in gaussian blur).
Now, as a new CS3 user, how do you save this as an action.
Now, as a new CS3 user, how do you save this as an action.
- Messages
- 5,178
- Name
- Gary
- Edit My Images
- Yes
I simply went through all of the process except the gaussian blur bit and saved that as an action. In practice I very nearly always use 250pixels then reduce opacity of layer.Now, as a new CS3 user, how do you save this as an action.
HTH.
andy_fozzy
SPAM Merchant
- Messages
- 7,450
- Name
- Andy!
- Edit My Images
- Yes
Nice one, works very well indeed.
Grateful to you for taking the time to post.
Grateful to you for taking the time to post.
andy_fozzy
SPAM Merchant
- Messages
- 7,450
- Name
- Andy!
- Edit My Images
- Yes
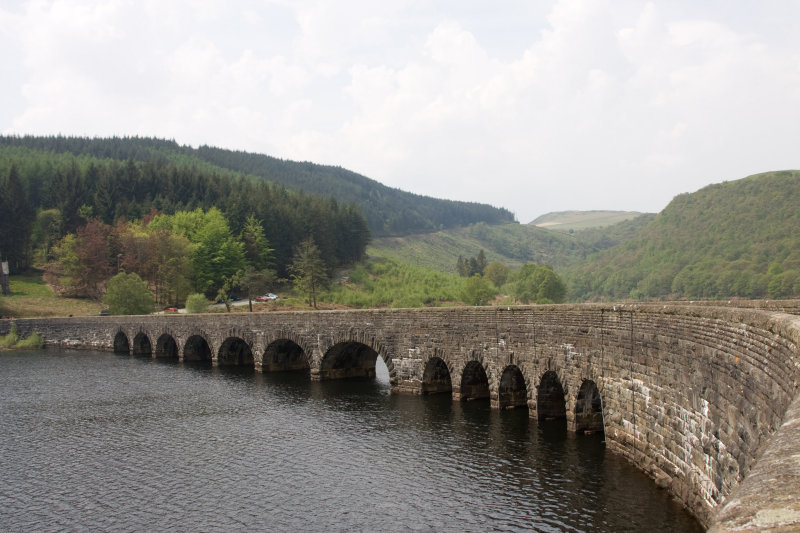
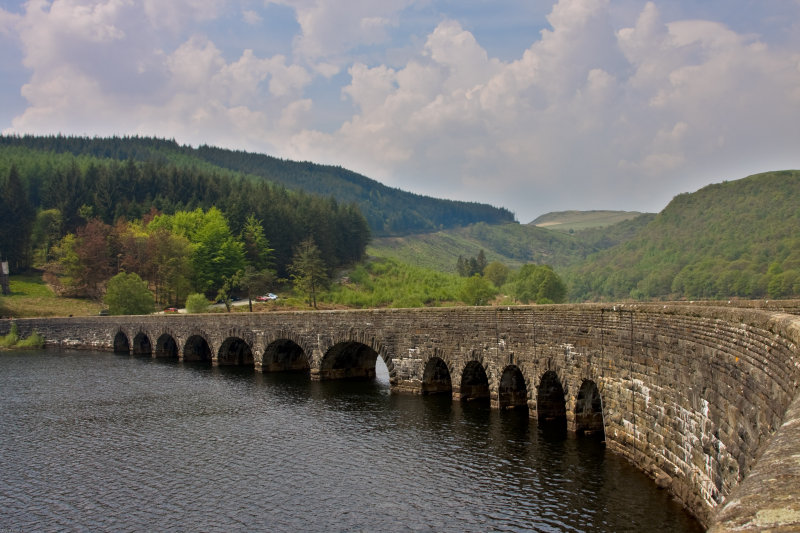
Here's my attempt:
Original:

Adjusted:

 this technique!
Original:

Adjusted:

- Messages
- 889
- Name
- Spike
- Edit My Images
- Yes
I have a large collection of photos that might just have their bacon saved by this technique.
- Messages
- 9,907
- Name
- Graham
- Edit My Images
- Yes
Am I reading this correctly in that you only need one source image because you are duplicating the layer? If so then I think this is a great tip as although I quite like HDR, it's not really ideal if there's movement in the frame, whereas this method overcomes this. Is this right?
- Messages
- 3,836
- Name
- Trev
- Edit My Images
- Yes
This is a great post. Have used this and am impressed. I have set it as an action, but .......................
Once you have completed the action can you amend it? I ask as some photos need different opacity and blur.
yes.. in the actions.. theres a box to the left of each bit.. click the ones that you want control over.
stan the man
Nutkicker
- Messages
- 7,299
- Name
- mark
- Edit My Images
- Yes
wow craig...what a difference 
- Messages
- 4,379
- Edit My Images
- Yes
Creat duplicate layer > ctrl and J
then Image menu > adjustments > invert
then on the layers panel on right, drop down box that by default says 'normal' and change it to overlay
then Filter menu, gaussian blur - for a full res image you should set this to about 80 pixels on the slider - but play around for best setting for each image
then go back to the layers panel and use opacity slider to adjust the level of the effect to a position you like
then Layers menu - flatten image
I have Corel Paint Shop Pro Photo X2 and i don't have Image menu - Adjustments - Invert...
Ok i think its IMAGE MENU - MIRROR ?
Last edited:
- Messages
- 4,379
- Edit My Images
- Yes
Hmmm looks like arse on my images , can we have a STEP BY STEP with
Corel Paint Shop Pro Photo X2 please
Corel Paint Shop Pro Photo X2 please
Forbiddenbiker
The Enforcer
- Messages
- 11,048
- Name
- Adam
- Edit My Images
- Yes
I used to use corel draw Neil, I'm sure it did something similar.. can't remember what it was though, maybe, make 'negative' or transparency/inverted..
- Messages
- 1,907
- Name
- paul rogers
- Edit My Images
- Yes
Hmmm looks like arse on my images , can we have a STEP BY STEP with
Corel Paint Shop Pro Photo X2 please
yeah can we have a step by step guide
i tried it but done something wrong I know it me but what did i not do
photon
Junior Member
- Messages
- 5,123
- Edit My Images
- Yes
Did you see: http://www.talkphotography.co.uk/forums/showpost.php?p=658245&postcount=47
There are freeware plugins available also, but I've not tried any.
There are freeware plugins available also, but I've not tried any.
Last edited:
- Messages
- 908
- Name
- Tracy
- Edit My Images
- No
I have Photoshop and there is a Plug In for it to make the HDR effect and it works quite well and is a LOT quicker than trying to do it stage by stage 
Its called ReDynaMix HDR and can be found on www.mediachance.com.
Hope that might help someone
Tracy.

Its called ReDynaMix HDR and can be found on www.mediachance.com.
Hope that might help someone
Tracy.
- Messages
- 726
- Name
- Paul
- Edit My Images
- Yes
*** a top tip ..... thx for sharing it works a treat.


