small home studio set ups

Messages
910
Name
gary
Edit My Images
Yes
hi everyone.
id like to set up a smallish home studio, can anyone point me in the right direction for lighting and backdrops please.
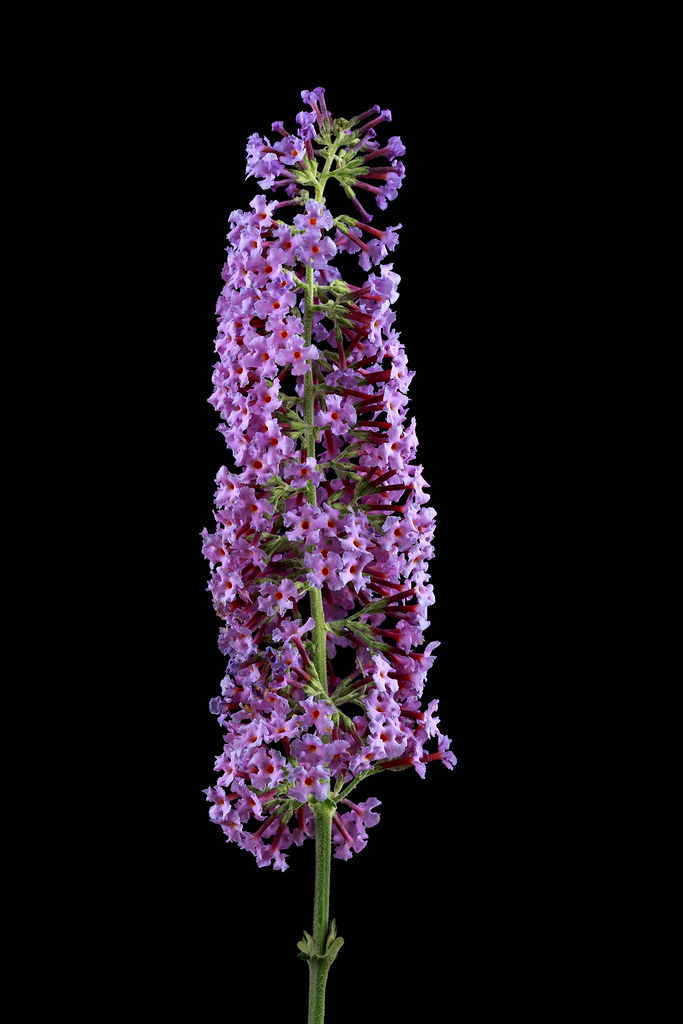
ive enclosed a picture which i took in my shed using two small ikea led lights the backdrop was three sheets of a4 card . this is the sort of thing i want to photograph and improve upon all help much appreciated thanks. Gary


CW0B4044.JPG1 - Copy.JPG
 
Hi Gary - I've also just set up a small studio at home
I've had a really good result with a photography backdrop I bought from Amazon - It was a big roll (really heavy) of vinyl - Grey one side and white the other. I have 4 very old budget lights and they light it perfectly - and it's big enough to roll up a wall for the seamless look

Your pic looks like you have a good lighting source, and your black card has worked a treat.

I'll attach a photo I've taken recently with the white side

I can't find the name or make of it - but if it's of interest let me know and I'll look back through my orders

Good luck
Andy
 

Attachments

  • Box with Hearts - 1024x768px.jpg
    Box with Hearts - 1024x768px.jpg
    162.1 KB · Views: 66
IMO, what you need is better lights to fill much larger modifiers... for product type stuff I frequently use 4ft softboxes and silks (diffusion screens) as large as 8ft, along with a lot of reflectors/flags.
 
Hi Gary - I've also just set up a small studio at home
I've had a really good result with a photography backdrop I bought from Amazon - It was a big roll (really heavy) of vinyl - Grey one side and white the other. I have 4 very old budget lights and they light it perfectly - and it's big enough to roll up a wall for the seamless look

Your pic looks like you have a good lighting source, and your black card has worked a treat.

I'll attach a photo I've taken recently with the white side

I can't find the name or make of it - but if it's of interest let me know and I'll look back through my orders

Good luck
Andy
Thanks for replying andy what are the lights you use I only need smallish backdrops aprox 500mm x 1500mm ish my shed is 10ft x6ft so big lights and big softboxes arnt really an option but I thing I need better lighting than what I'm using at present
 
Thanks for replying andy what are the lights you use I only need smallish backdrops aprox 500mm x 1500mm ish in black plus dark green to simulate grass and a few other colours to compliment the flowers I intend photographing my shed is 10ft x6ft so big lights and big softboxes arnt really an option but I think I need better lighting than what I'm using at present
 
  • Like
Reactions: nog
IMO, what you need is better lights to fill much larger modifiers... for product type stuff I frequently use 4ft softboxes and silks (diffusion screens) as large as 8ft, along with a lot of reflectors/flags.
Thanks for replying a 4ft softbox would be way to big in my shed could you suggest a smaller set of lights any links etc thanks
 
Smaller softboxes will produce a harsher light, hence the recommendation of using larger ones.

No real way round that to be honest with the shed size.

My shed is 10' x 20' and use the 2 100cm boxes. Even that's a squeeze.
 
Thanks for replying a 4ft softbox would be way to big in my shed could you suggest a smaller set of lights any links etc thanks
That 4ft softbox is typically placed w/in 2ft of the subject, the modifiers can be big and harder to work around but it doesn't require a huge space... the room I usually work in is about 10x10ft.
You can use silks instead of softboxes, but controlling the spill/bounce in a small space can be difficult. That said, all of the bounce might be "beneficial" in some cases as it makes for softer overall lighting.
 
So will I still need softboxes with my flashes and if so any recommendations please I have three Yongnuo flashes
 
Shooting in a small space can be challenging, however it's all relative :) Relative to the size of the subject and as Steven said, it's all about relative distances from the light (if the light is twice as far from the other side of the shed than it is to the subject then it's 2 stop dimmer by the time it gets there and so on. I work in a space about 3.5 x 5m (which is massive compared to the previous space I had) and you can get an idea from these BTS shots of some of the things I've done to make it usable: satin black floor, very dark grey walls at the back (Dulux Ice Storm II). Barn doors on the reflectors, grids on most things and of course, lights in as close as I can get them. For small subjects this is easy. For people, some more tricks are sometimes needed. For example, I'll have the lights so close they are in the shot and remove them in post. If the background is black, this is trivial and is done with an adjustment brush in Lightroom. If not, then it's still easy, but I'll use the content aware fill, and clone stamp tools/healing brush in Photoshop. I often shoot subjects vertically in the camera, and then add width to end up with a 16:9 horizontal format image. The boring pixels are made up by Photoshop though to end up with a 100Mpixel+ file giving the illusion of a huge shooting space. Also, remember that although your shed may be 10 ft long, if it's not raining, you can put the camera outside and shoot through the door. I often also put lights outside the room on the landing to get a bit of extra distance.

In terms of a shopping list this means:-

Black cloth (muslin or duvetine) for absorbing light
Black foam core boards for flags (or use as backgrounds as you're already doing with the black cards). Art shops sell these board for a few pounds. In fact I often buy the damaged ones for half price is the creases don't matter if you're just using it to flag light.
White foam core for reflection (shadow filling)
Bigger lights in closer
Softboxes with grids
In fact everything with grids :p
and consider a small spot projection system to really focus light down. I use the Lightblaster which works best with speed-lights (small flash)
plus maybe some wall mounting for the lights to minimise floor stands.
 

Attachments

  • DSC_0368-Website.jpg
    DSC_0368-Website.jpg
    364.2 KB · Views: 74
  • DSC_0370-Website.jpg
    DSC_0370-Website.jpg
    364.4 KB · Views: 71
  • DSC_0373-Website.jpg
    DSC_0373-Website.jpg
    437.2 KB · Views: 77
  • _DSC4494-Edit-Website.jpg
    _DSC4494-Edit-Website.jpg
    257.4 KB · Views: 73
Last edited:
I think that you've done a very good job so far, you've avoided the common beginner mistake of flooding the subject with light, and instead have created the right shadows in the right places.
Everyone who has replied before me has given you good info, but I would query the assumption that really big softboxes are needed here, although they certainly would be needed if you were photographing shiny subjects.
Too big a softbox can cause (not cure) problems with textured subjects, because what you need in most cases is low overall contrast but with high local contrast, and although this can be done with a large softbox with a honeycomb grid fitted, it's usually better if it's about the same size as the subject, which I'm guessing means 60-80cm.

By all means use a really big one and mask down the front to effectively reduce the size, that would work well with a large space but in a small space, a smaller softbox is usually a better option.
 
but I would query the assumption that really big softboxes are needed here, although they certainly would be needed if you were photographing shiny subjects.
I'll pose this as a question, or discussion point... because I have not specifically shot bouquets like this before.

If I were going to photograph these flowers I would start with a softbox overhead and feathered forward/graduated somewhat. And I would place it very close in order to create translucent highlights/soft shadows with a lot of falloff for depth. I would likely augment that with secondary lighting which might be just small silver foil reflectors for this subject, but that's off topic.
IME, when using a softbox in this way having it be oversized isn't a problem in terms of the lighting it creates, because the falloff is too great. Basically, anything over a certain size/distance is wasted. Or am I mistaken? Being that I haven't shot exactly this type of subject I'm "going on instinct" here.

I agree that there are issues with oversized modifiers, but there are modifications for most of them such as the grid you noted, or masking/flagging. The converse of this is that there are also issues with undersized modifiers, but there are no modifications for that (other than grouping them, which may not work well and is an even bigger mess). I would say that the main issue with oversized modifiers is simply space... the ability to position them where needed and work around them. And I can certainly see wanting to avoid that if it's unnecessary.
I guess this relates to the other thread where I noted that maybe I'm the odd one because I usually work by changing distances more than I change the size of the modifiers... and maybe that's because I usually start with large modifiers (diffusion types) and work down from there. FWIW, I wasn't specifically recommending the sizes I mentioned later on, only "much larger" than the small LEDs. Although I would probably use them as that's what I have (I do have some smaller modifiers in storage somewhere I think, maybe I should pull them out).
 
I think that you've done a very good job so far, you've avoided the common beginner mistake of flooding the subject with light, and instead have created the right shadows in the right places.
Everyone who has replied before me has given you good info, but I would query the assumption that really big softboxes are needed here, although they certainly would be needed if you were photographing shiny subjects.
Too big a softbox can cause (not cure) problems with textured subjects, because what you need in most cases is low overall contrast but with high local contrast, and although this can be done with a large softbox with a honeycomb grid fitted, it's usually better if it's about the same size as the subject, which I'm guessing means 60-80cm.

By all means use a really big one and mask down the front to effectively reduce the size, that would work well with a large space but in a small space, a smaller softbox is usually a better option.
Cheers Garry thanks for your input I don't suppose you could link me to a nice small complete lighting set up suitable for single flowers up too a vase of flowers which will be largest thing I'll ever photograph in my shed .
Im also on the look out for some smallish backdrops aprox 600mm x x 1200mm in a selection of colours, im not to sure which colours are suited to flower photography.
thanks in advance Gary
 
Last edited:
I'll pose this as a question, or discussion point... because I have not specifically shot bouquets like this before.

If I were going to photograph these flowers I would start with a softbox overhead and feathered forward/graduated somewhat.
And that's a good starting point. Problem is, angling it forward (to light just the top of the actual subject and, at the same time, provide an element of backlighting) requires an element of knowledge/understanding that a lot of beginners struggle with, and they tend to have light light pointing straight down instead.
Whether it's placed really close or not, an oversized softbox tends to produce light that spills onto the sides, lighting parts that really need to be lit separately.
A softbox is the "easy" answer but personally I normally use a small-ish beauty dish, to get more specular lighting. I haven't re-read that 'Silkblooms' thread (which I think was one of this forum's success stories) but from memory that's what I bullied him into getting, in order to avoid the problems of lighting that was too soft and too large for the purpose.
IME, when using a softbox in this way having it be oversized isn't a problem in terms of the lighting it creates, because the falloff is too great.
You're not wrong, but if it is placed really close, the dramatic fall-off of light creates an unecessary problem that most people struggle to combat and they tend to end up with an overexposed top or an undereexposed bottom.
Personally, I find most of what you say to be absolutely fine, and to paraphrase a famous Irishman, we are generally united except for the common language that divides us:) But with me, it's often a case of "Do as I say, not as I do" because although I will use all sorts of lighting modifiers at all sorts of distances, I like to explain things in simple terms, and so recommend the types of modifier that suit that particular set of circumstances best, and de-skill the process.

I would likely augment that with secondary lighting which might be just small silver foil reflectors for this subject, but that's off topic.
.
And that would work, although personally I tend to use honeycomb grids fitted to a standard reflector - much more controllable.
 
Cheers Garry thanks for your input I don't suppose you could link me to a nice small complete lighting set up suitable for single flowers up too a vase of flowers which will be largest thing I'll ever photograph in my shed .
Im also on the look out for some smallish backdrops aprox 600mm x x 1200mm in a selection of colours, im not to sure which colours are suited to flower photography.
thanks in advance Gary
My advice would be get to get low/medium powered studio flash, this kit https://www.lencarta.com/smartflash-3-complete-studio-lighting-kit-600w is almost ideal but with one of the 85cm Chiaro softboxes. https://www.lencarta.com/s-fit-85x85cm-redline-pro-chiaro-softbox. Also, get a standard reflector https://www.lencarta.com/smartflash-18cm-7-inch-standard-reflector and a 10 degree honeycomb, https://www.lencarta.com/standard-reflector-10-degree-universal-honeycomb-grid both of which you will need. It would also be very helpful to get the 20 degree honeycomb, for when the 10 degree version is too effective/dramatic https://www.lencarta.com/standard-reflector-20-degree-universal -honeycomb-grid and I would also get a 5-in-one reflector, which utilises "spare" light and which can often save the cost of buying an extra flash head https://www.lencarta.com/80cm-5-in-1-collapsible-reflector The umbrellas supplied with the kit are of no use to you but you can configure exactly what you need here https://www.lencarta.com/custom-bespoke-studio-lighting-kits
https://www.lencarta.com/custom-bespoke-studio-lighting-kits
Similar products are available from other suppliers.

As for backgrounds, the important thing is to get as much distance between the subject and background as possible, for 2 reasons:
1. You don't want light that's intended for the subject to hit the background accidentally
2. You don't want colour from the background to pollute the subject.

I don't know much about what's currently available in backgrounds and other people may be able to help more, but you may like to take a look at the Colormat range, which are available in various colours https://www.manfrotto.co.uk/colorama-colormatt-background-pvc-100-x-130cm-dove-grey
They are non-reflective vinyl, they wipe clean and will last for pretty well ever as long as you don't allow them to become creased.
Cheers Garry I'll take a look at the links I'm off on my hols very soon so will report back with a few pictures when I get the lighting set up
 
Thanks for replying andy what are the lights you use I only need smallish backdrops aprox 500mm x 1500mm ish my shed is 10ft x6ft so big lights and big softboxes arnt really an option but I thing I need better lighting than what I'm using at present

Hi Gary - I use 5 very old Portaflash units - They are old, discontinued and were pretty rubbish back in the 90's - But they are super cheap and they are small
I use two bouncing light off the ceiling - and two facing forward with brollies and I'm really pleased with my results (and the 5th as and when I need a little extra)

I agree with all the other comments on here and would never question the professionals however as a keen hobbyist (I hate the phrase - but I'm no pro) they are suited for my needs - But I am only doing fairly small product photography

I have converted a fairly small garage - It's brand new and all white (for bouncing) I can send a pic if you's like to see - and with 4/5 flashes on the go I have just enough room - I also tether my Nikon to my laptop and am shooting via my laptop - I find it gives me more control and consistency ...and again I have just enough room. If I used the bigger units as discussed, I'd never have enough room - So I have to weigh up what I want more

Anyway - I'm a tiny fish compared to the others on here - but happy to help - just shout

Cheers
Andy
 
Hi Gary

Here are two examples of what I've done recently with the set up I explained in my previous post

Andy
 

Attachments

  • Beige Mary Jane with TEXT - 1024x768px.jpg
    Beige Mary Jane with TEXT - 1024x768px.jpg
    286.3 KB · Views: 40
  • White Mary Jane Shoes - 1024x768px.jpg
    White Mary Jane Shoes - 1024x768px.jpg
    195.9 KB · Views: 37
One last post from me - then I promise I'll shhh

One other solution for space control in small studios - I've almost committed to 2 wall mounted camera brackets which are for the two units that I bounce off the ceiling (which generates a huge amount of light) so I may wall mount these with a socket and ball for smaller adjustments - That will save a lot of floor space

Small crappy units can be made to work really well if you are shy of space and budget

Over and out buddy - Hope my waffle helps

Andy
 
Hi Gary - I use 5 very old Portaflash units - They are old, discontinued and were pretty rubbish back in the 90's - But they are super cheap and they are small
I use two bouncing light off the ceiling - and two facing forward with brollies and I'm really pleased with my results (and the 5th as and when I need a little extra)

I agree with all the other comments on here and would never question the professionals however as a keen hobbyist (I hate the phrase - but I'm no pro) they are suited for my needs - But I am only doing fairly small product photography

I have converted a fairly small garage - It's brand new and all white (for bouncing) I can send a pic if you's like to see - and with 4/5 flashes on the go I have just enough room - I also tether my Nikon to my laptop and am shooting via my laptop - I find it gives me more control and consistency ...and again I have just enough room. If I used the bigger units as discussed, I'd never have enough room - So I have to weigh up what I want more

Anyway - I'm a tiny fish compared to the others on here - but happy to help - just shout

Cheers
Andy
Before I comment, I should say that I've hurt my back and am stuck indoors, dozy with painkillers and bored out of my mind, so I'm spending more time on this forum than normal for me:)
And I shouldn't comment anyway because you haven't asked for comments on either your setup or your photos.
And any comments that I might make are pretty irrelevant anyway, because I don't know what you're trying to achieve in your photos. What you've produced is very 'cute' high key photos, and if that's what you've set out to do then you've done well, and any views that a product photographer may have will be based on very different objectives to your own, and not helpful.

But, working on the premise that Mary Jane is a brand and that photos that include the brand name are likely to be intended to sell the products, then I would have a very different lighting approach.
By bouncing light as you have, all lighting control has been destroyed and basically you've just flooded the whole area with light, which is why pro photographers tend to avoid white studios like the proverbial plague.... Lighting isn't really about having light coming from all directions, in fact the opposite is true and the objective is to produce the right shadows in the right places.

If the OP has a similar studio setup, with lights everywhere, and all bouncing around all over the place, then his flowers etc will lack shadows, lack depth, lack definition and lack interest. They will be pretty pictures that won't grab the viewer's eye.
The starting point for just about any studio shot, almost regardless of subject of purpose, is to start off with just one light, and the job of this single light is to create the right light and the right shadows - the ones that show the qualities of the product.. And generally speaking, the more experienced the photographer is, the more likely s/he is to work in this way.
Then, the next step is to add another light or a reflector (if necessary), to mitigate or tone down excessive contrast or to light a part of the subject that needs to be lit but which hasn't been lit by the first (or key) light.
Then, if necessary, add further lights, one at a time, testing as you go.
And, regardless of the number of lights that you end up using, the key light is the one that sets the tone and which generally does 80 - 90% of the work.
This is called building the light, please see https://www.lencarta.com/studio-lighting-blog/tutorial-building-up-the-light/#.VyC_pnqGN-s - a second hand motorbike, a bigger and more complex subject but the principles never vary.

But as I say, I tend to view lighting as a sales tool, and if you're happy with the results you're getting with your approach, just ignore me and tell me to bugger off:wave:


Hi Garry

Not at all - I am totally open for learning and improving - It's why I am on here
I welcome any critique - people can be as harsh as they like - I just want to improve my skills and create better images

As for the pics...

White on white - What a pig

Unfortunately, it's the look required - Almost spacey/faded but detailed

It can't look like I've cut the image out via photoshop and stuck it on a pure white background - It's to look real but very white
As I said I am no pro - but the fewer lights i've used, the background turns to grey

I'm conscious that I may have hijacked this thread - Really sorry - but would love to tap into your advice please

Cheers
Andy
 
Garry Edwards as your a captive audience and I hope your backs gets better soon and as im a complete novice to studio lighting,
in my shed well studio to us photographers :)
I have a work top set at work top height ;) on which I plan to stand my flowers etc with backdrop.
( I plan on buying the gear you recommended ) where would you place the first light? directly above the subject ?
and roughly where would the second light be positioned. I know you cant answer accurately due to the different lighting situations and what is wanting to be achieved.
but as just a general starting point.
and also referring to the kit you advised will I be using the smartflash3 with just the grid fitted no soft-box ? thank you very much for your help
 
lighting set up suitable for single flowers up too a vase of flowers
When you get into photographing reflective curved things (vases) it starts to get a lot more challenging... that's why I have 8ft silks. In these situations I find that it's better to think in terms of "creating the environment" that will be seen/reflected rather than "lighting" as such.
could anyone post pictures of their small home studios please
I would be embarrassed to post a photo of it's current state...:eek:
 
When you get into photographing reflective curved things (vases) it starts to get a lot more challenging... that's why I have 8ft silks. In these situations I find that it's better to think in terms of "creating the environment" that will be seen/reflected rather than "lighting" as such.

its all challenging lol what are the silks are they a sot of light shade screen

I would be embarrassed to post a photo of it's current state...:eek:

my sheds mint lol nothing in it yet :) id be interested to see how you set up your lights etc as im sure other novices would too im not sure what ive done here
 
Last edited:
Hi Garry

Not at all - I am totally open for learning and improving - It's why I am on here
I welcome any critique - people can be as harsh as they like - I just want to improve my skills and create better images

As for the pics...

White on white - What a pig

Unfortunately, it's the look required - Almost spacey/faded but detailed

It can't look like I've cut the image out via photoshop and stuck it on a pure white background - It's to look real but very white
As I said I am no pro - but the fewer lights i've used, the background turns to grey

I'm conscious that I may have hijacked this thread - Really sorry - but would love to tap into your advice please

Cheers
Andy
Yes, white on white is always a challenge for all of us, but it's easy enough to get that "Almost spacey/faded" look but with the detail that's missing here..
Your problem is made a bit more difficult by the limitations of your lighting, but it's still do-able.
I would paint the ceiling black (temporarily, to find out whether I'm right or not, you could put a bit of black cloth ['or Blackwrap/Cinefoil] up there)
Then, fit a softbox to one of your lights. Unfortunately, one of the 'qualities) of the Portaflash is that they don't have an accessory mount but there are some so-called universal mount softboxes available, not perfect but perfectly usable. You will need to measure the front of your flash, but I think this one will fit http://www.ebay.co.uk/itm/50x70cm-S...984645?hash=item2a36617b45:g:rQ8AAOSwKIpWAW~s and is about the right size for this subject.
Mount it above and behind your subject, so that it lights the background, the top and part of the front. This will leave a gentle shadow at the front, similar to the one that you already have. The position is shown and explained in this article https://www.lencarta.com/studio-lighting-blog/controlling-specular-reflections/#.VjzW6ysl-hE but in that article, the softbox is placed so close to the subject that it's almost touching, in order to get the diffused specular highlights needed for that particular subject.
In your case, it would need to be quite a bit higher, I can't tell you how much, but start at say 3' and experiment from there. Also, experiment with the angle. Getting it a good distance away will produce a harder light, which is less boring, and it will also reduce the amount of light. Another of the problems that you have with your lights is the lack of power adjustment, so moving it further away will help with this too. If it's still too bright, get a neutral density gel, say 0.3 (1 stop) and put it in front of the light to halve the power http://www.ebay.co.uk/itm/0-3-ND-NE...137619?hash=item256c434413:g:Tn8AAOxycD9TVYcI

In my far from humble view, the single biggest problem is the totally flat lighting and the lack of definition in the shoes, I can see that they're made of wool but the flat lighting has destroyed that look, and you need to introduce a second light, from an acute angle, that will skim across the surface.
With more professional lights, I would fit a standard reflector to the flash, and fit a 10 degree honeycomb to it, but as far as I know there isn't anything available for the Portaflash.
I may be wrong, but I don't think that this flashgun snoot with honeycomb will fit your flash, but at least it will show you what's needed https://www.lencarta.com/flashgun-snoot-with-honeycomb-grid and you should be able to make something similar out of a piece of blackwrap/Cinefoil or even black paper.
The acute angle will be from one side or the other, not from the top, and will need to be positioned with care, but it will work wonders! I don't like to give specific advice when I haven't got the subject in front of me, but logic says that this snooted light should come from both the right and the left of the subject, because one light can't do the job on both ends, which means that you need to fit a snoot to two lights - but have a go with one, which will show you whether I'm right or not. Get these lights as far away as space allows, this makes the light harder, creates harder shadows (and therefore greater definition) but with your lights you may not have enough power to place them as far away as you might wish - and it's this extra power, needed for the snooted light, which made me suggest getting a neutral density gel for the softbox light.

At this point, I would say "job done" but it's possible that you might want to add another light as fill, at very low power, but it's equally possible that this extra light would go some way towards destroying the improvements.

Just try it, and please post your results:)
 
When you get into photographing reflective curved things (vases) it starts to get a lot more challenging... that's why I have 8ft silks. In these situations I find that it's better to think in terms of "creating the environment" that will be seen/reflected rather than "lighting" as such.

I would be embarrassed to post a photo of it's current state...:eek:


its all challiging to me lol what are silks are they a kind of light screen shade ?
my sheds mint lol nothing in it yet :) id be interested to see how you set up your lights etc as im sure other novices would too
 
Garry Edwards as your a captive audience and I hope your backs gets better soon and as im a complete novice to studio lighting,
in my shed well studio to us photographers :)
I have a work top set at work top height ;) on which I plan to stand my flowers etc with backdrop.
( I plan on buying the gear you recommended ) where would you place the first light? directly above the subject ?
and roughly where would the second light be positioned. I know you cant answer accurately due to the different lighting situations and what is wanting to be achieved.
but as just a general starting point.
and also referring to the kit you advised will I be using the smartflash3 with just the grid fitted no soft-box ? thank you very much for your help
Gary, the general advice in my last post applies to you too, but you have the advantage of better equipment - this doesn't automatically produce better results, but it makes it easier to get good results, and for those results to be consistent.
Again, you would put your honeycombed light as far away as space allows, and set it to skim across the subject from an acute angle. The effect will be dramatic, and if it's too dramatic then use the 5-in-1 reflector on the other side to reflect some light back. The closer the reflector is to the subject, the greater it's effect will be, so you can get a lot of different effects just by adjusting its distance.
If your flowers are in a vase or similar, make sure that none of the light from the honeycombed light touches the vase. This is easy to do with a 10 degree honeycomb.
 
where would you place the first light? directly above the subject ?
You really should go read through the discussion Mike linked to above... Garry and others walked someone through gear/setup/etc for exactly this kind of stuff.

This image from that thread is the basic setup...

lights_setup.jpg


IMO the setup still has issues at this point, but I don't think a final image was posted... and it's worth noting that the overall setup is more about "concepts" than the specific gear. Basically, the softbox is creating the overall "soft light" and fill while the gridded BD is creating hard speculars/shadows to bring out details by cutting across the surface. The softbox is a bit too high/flat/small, and the BG (walls) are too close (although greater BG separation would likely require separate BG lighting). The size of the BD is overkill in this specific situation, but it doesn't really hurt (other than excess light hitting the BG)... pretty much any "hard/specular" light source will do, even silver foil reflectors instead of a second light could work (small reflectors have their advantages/disadvantages as does adding another light). In this situation the standard reflector (7"?) with 10* grid that Garry suggested will work just as well as the larger BD, probably better (particularly in a smaller space).

I have a very large (5x6') product photography table custom made from transparent plexi with integrated BG rolls... but as often as not it's more problematic than useful. For something like this I would just use a small platform surface on a stand rather than a table. Heck, sometimes I use a support arm/stand which just clamps to one leg of the camera tripod and no separate table/support at all... it's not really suited for this particular subject, but the point is that "a table" isn't always necessary and it can often be more problematic than using something much smaller/simpler.

Edit: I have small platforms of various sizes cut from 3/4" plywood. I attached a quick release plate (arca swiss) to each of them and they mount on a cheap/spare tripod... that's probably what I would use here.
 
Last edited:
Yes, white on white is always a challenge for all of us, but it's easy enough to get that "Almost spacey/faded" look but with the detail that's missing here..
Your problem is made a bit more difficult by the limitations of your lighting, but it's still do-able.
I would paint the ceiling black (temporarily, to find out whether I'm right or not, you could put a bit of black cloth ['or Blackwrap/Cinefoil] up there)
Then, fit a softbox to one of your lights. Unfortunately, one of the 'qualities) of the Portaflash is that they don't have an accessory mount but there are some so-called universal mount softboxes available, not perfect but perfectly usable. You will need to measure the front of your flash, but I think this one will fit http://www.ebay.co.uk/itm/50x70cm-S...984645?hash=item2a36617b45:g:rQ8AAOSwKIpWAW~s and is about the right size for this subject.
Mount it above and behind your subject, so that it lights the background, the top and part of the front. This will leave a gentle shadow at the front, similar to the one that you already have. The position is shown and explained in this article https://www.lencarta.com/studio-lighting-blog/controlling-specular-reflections/#.VjzW6ysl-hE but in that article, the softbox is placed so close to the subject that it's almost touching, in order to get the diffused specular highlights needed for that particular subject.
In your case, it would need to be quite a bit higher, I can't tell you how much, but start at say 3' and experiment from there. Also, experiment with the angle. Getting it a good distance away will produce a harder light, which is less boring, and it will also reduce the amount of light. Another of the problems that you have with your lights is the lack of power adjustment, so moving it further away will help with this too. If it's still too bright, get a neutral density gel, say 0.3 (1 stop) and put it in front of the light to halve the power http://www.ebay.co.uk/itm/0-3-ND-NE...137619?hash=item256c434413:g:Tn8AAOxycD9TVYcI

In my far from humble view, the single biggest problem is the totally flat lighting and the lack of definition in the shoes, I can see that they're made of wool but the flat lighting has destroyed that look, and you need to introduce a second light, from an acute angle, that will skim across the surface.
With more professional lights, I would fit a standard reflector to the flash, and fit a 10 degree honeycomb to it, but as far as I know there isn't anything available for the Portaflash.
I may be wrong, but I don't think that this flashgun snoot with honeycomb will fit your flash, but at least it will show you what's needed https://www.lencarta.com/flashgun-snoot-with-honeycomb-grid and you should be able to make something similar out of a piece of blackwrap/Cinefoil or even black paper.
The acute angle will be from one side or the other, not from the top, and will need to be positioned with care, but it will work wonders! I don't like to give specific advice when I haven't got the subject in front of me, but logic says that this snooted light should come from both the right and the left of the subject, because one light can't do the job on both ends, which means that you need to fit a snoot to two lights - but have a go with one, which will show you whether I'm right or not. Get these lights as far away as space allows, this makes the light harder, creates harder shadows (and therefore greater definition) but with your lights you may not have enough power to place them as far away as you might wish - and it's this extra power, needed for the snooted light, which made me suggest getting a neutral density gel for the softbox light.

At this point, I would say "job done" but it's possible that you might want to add another light as fill, at very low power, but it's equally possible that this extra light would go some way towards destroying the improvements.

Just try it, and please post your results:)

Hi Garry - What can I say - THANK YOU for the detail
I do have a softbox that fits the portaflash and a honeycomb snoot - (just the one tho but I think they are out there fairly cheap)

I am going to follow your instructions word for word - and I'll post the outcome. I won't get a chance until the weekend but I will do it (I want to do it NOW)

Really really appreciate your help and guidance

Andy
 
You really should go read through the discussion Mike linked to above... Garry and others walked someone through gear/setup/etc for exactly this kind of stuff.

This image from that thread is the basic setup...

lights_setup.jpg


IMO the setup still has issues at this point, but I don't think a final image was posted... and it's worth noting that the overall setup is more about "concepts" than the specific gear. Basically, the softbox is creating the overall "soft light" and fill while the gridded BD is creating hard speculars/shadows to bring out details by cutting across the surface. The softbox is a bit too high/flat/small, and the BG (walls) are too close (although greater BG separation would likely require separate BG lighting). The size of the BD is overkill in this specific situation, but it doesn't really hurt (other than excess light hitting the BG)... pretty much any "hard/specular" light source will do, even silver foil reflectors instead of a second light could work (small reflectors have their advantages/disadvantages as does adding another light). In this situation the standard reflector (7"?) with 10* grid that Garry suggested will work just as well as the larger BD, probably better (particularly in a smaller space).

I have a very large (5x6') product photography table custom made from transparent plexi with integrated BG rolls... but as often as not it's more problematic than useful. For something like this I would just use a small platform surface on a stand rather than a table. Heck, sometimes I use a support arm/stand which just clamps to one leg of the camera tripod and no separate table/support at all... it's not really suited for this particular subject, but the point is that "a table" isn't always necessary and it can often be more problematic than using something much smaller/simpler.

Edit: I have small platforms of various sizes cut from 3/4" plywood. I attached a quick release plate (arca swiss) to each of them and they mount on a cheap/spare tripod... that's probably what I would use here.
Thanks for that and yes I will read the said link but I'm off on my hols very shortly so I'm just gathering information and will Act on it when I'm back home cheers gary
 
Gary, the general advice in my last post applies to you too, but you have the advantage of better equipment - this doesn't automatically produce better results, but it makes it easier to get good results, and for those results to be consistent.
Again, you would put your honeycombed light as far away as space allows, and set it to skim across the subject from an acute angle. The effect will be dramatic, and if it's too dramatic then use the 5-in-1 reflector on the other side to reflect some light back. The closer the reflector is to the subject, the greater it's effect will be, so you can get a lot of different effects just by adjusting its distance.
If your flowers are in a vase or similar, make sure that none of the light from the honeycombed light touches the vase. This is easy to do with a 10 degree honeycomb.
Cheers Garry yes I had already posted about using the grids and placement of lights before I saw your other post which I realised it's similar info I'm after thanks again
 
Diffusion screens... (i.e. translucent shower curtains from the dollar store ;) ).
There was a (very long) thread a while ago that may help
https://www.talkphotography.co.uk/threads/photographing-knives.638682/
As always, it wandered off track. The bit about the silks is on page 2.

Unfortunately, the promised tutorial never did get finished. I did the written bit but then retired, and the video bit didn't get done, and the reason for this is that HMG indicated that the laws will change on selling knives by mail order, so the client dropped the whole idea.

Back to topic, it's good to have a thread on lighting technique, most of the questions on this forum these days seem to be about flashguns and radio triggers, and why it seems to matter to have yet another obscure feature on them:(
So these smartflashheads can they be used as continuous lighting too or only as flash ? would continuous lighting help me in my small space as at least with lights on I can actually see the lighting casting it's shadows highlights etc but with flash it's more trail and error or am I missing something it won't be the first time
 
The flash bit does the work, but they also have modelling lamps, these are continuous lamps that indicate where the shadows will fall. The modelling lamps have no noticeable effect on the exposure.
 
Back
Top